|
Want to sneak some more veggies into your lunch? This recipe will get the job done and it tastes great. This zucchini & carrot slaw makes a delicious side dish, the base for a salad, or even a condiment! It will keep for 5-6 days in the fridge in an airtight covered container. Add your favourite protein – diced chicken, rinsed & drained canned beans, or even chopped hardboiled eggs – just before serving. Yum! Let’s talk about ZUCCHINI! Depending on where in the world you live, you might know zucchinis as “courgettes.” And even though we usually think of them as a veggie, they’re actually fruits that can grow up to 1 yard/1 meter long! Bigger is not always better — smaller zucchinis are tastier and have a better texture for eating. They can be baked into casseroles or bread, eaten raw, shredded, spiralized into “zoodles,” added to stir-fries, and steamed. Which makes them a great choice to boost your fruit & veggie intake. They are loaded with vitamin A (especially when cooked), as well as compounds called carotenoids that are good for your eyes, skin, and heart… and they may even have cancer-fighting powers.  (makes 4 servings)
Make the dressing: whisk together the rest of the ingredients until it emulsifies. Drizzle it over the veggies and toss to combine. This one is definitely a winner! This Easy, Quick, Elegant dinner recipe ... that is also SUPER healthy. It is loaded with protein thanks to the fish, and the tomatoes contain (among other things) plenty of vitamin C and potassium. You might be tempted to use fresh tomatoes, but canned tomatoes taste much better in this recipe because they are picked at the peak of ripeness. 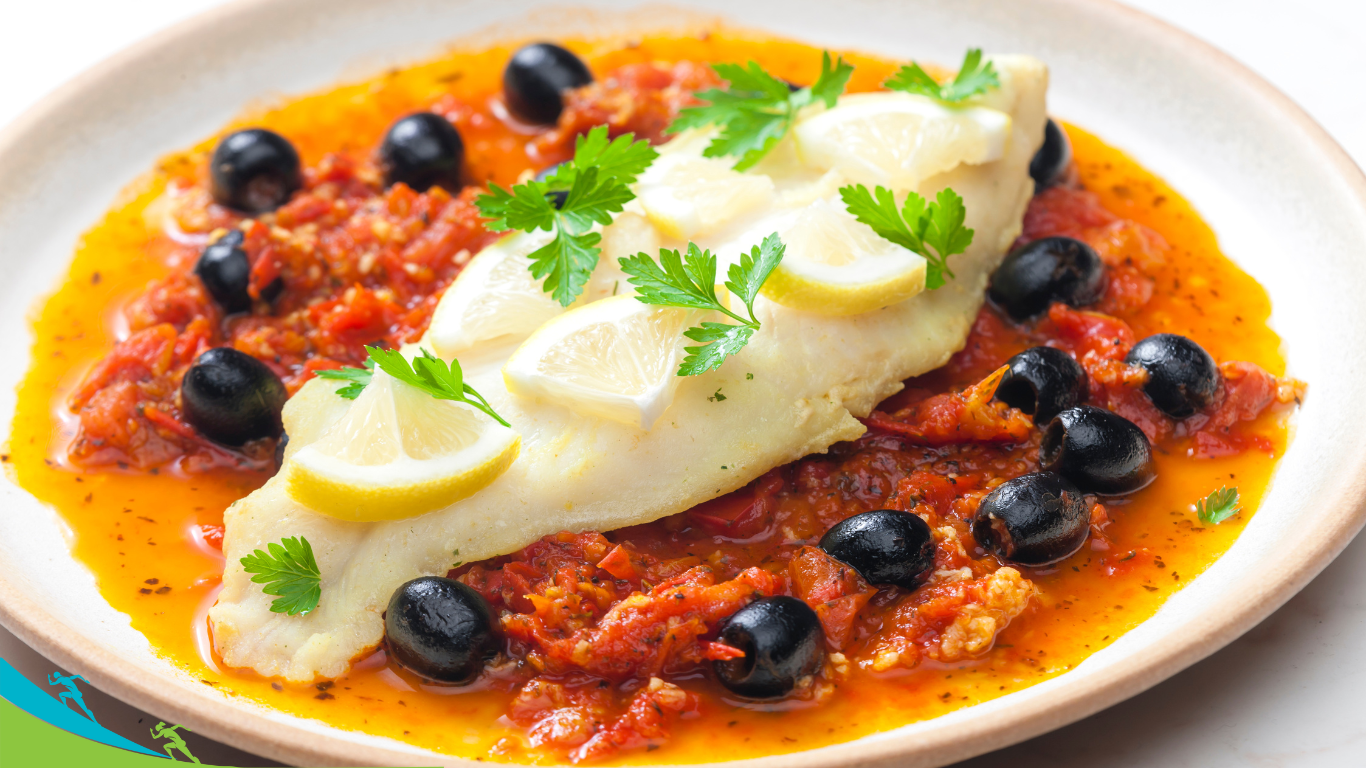 (serves 4)
● 1 28 oz (794 g) can of whole , peeled plum tomatoes ● ½ cup (120 ml) apple cider vinegar ● ½ cup (90 g) pitted Kalamata olives, sliced in half ● 4 cloves garlic, minced ● 1 Tbsp honey ● Sea salt and freshly ground black pepper ● 4 6 oz (170 g) haddock fillets (or other white fish), skin removed ● ¾ tsp Italian seasoning Preheat your oven to 425ºF/220ºC. In a 9x13 inch (23x33 cm) baking dish, combine the canned tomatoes, vinegar, olives, garlic, honey, a few pinches of salt, and several grinds of pepper. Set aside. Pat the fish dry with a paper towel. Season it with Italian seasoning and lightly sprinkle with salt and pepper. Place the fish in the baking dish and put the dish in the oven. Bake for about 15 mins, until the fish is cooked through (it should flake easily with a fork). If your fish is thick, it might take a little longer. Serve with a salad and a side of veggies. YUM! Try this for dinner this week! It is So GOOD! Enjoy! You are in for a TREAT! This is a GREAT (& healthy) version of classic Asian lettuce wraps – light, tasty, and super easy to throw together. 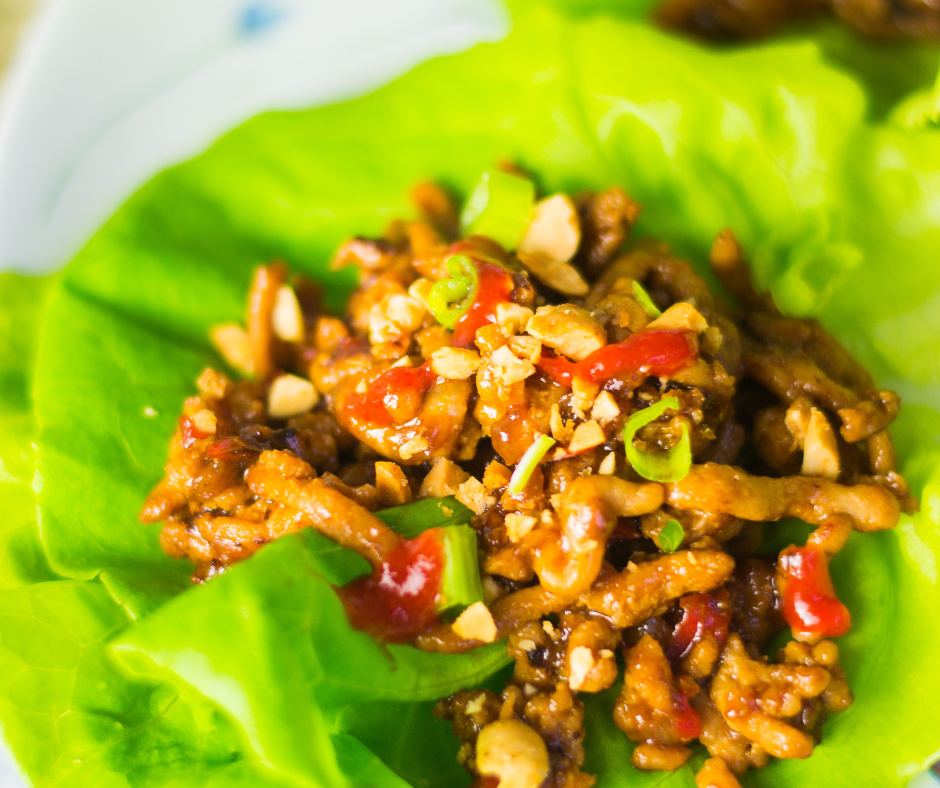 (serves 4)
Heat the sesame oil in a large skillet over medium-high heat. Add the mushrooms and cook for 5 minutes, until soft, stirring occasionally. Add the optional garlic and ginger and cook for another 1-2 minutes, stirring constantly. Add the ground turkey and cook, stirring frequently, until browned through (about 6 minutes). Stir in the coconut nectar. Season with salt and pepper to taste. Place 4 lettuce leaves on 4 separate plates. Divide the turkey mixture between each of the leaves, wrap them up, and enjoy! :) YUM. Pineapple and cashews give plain quinoa an exotic flair in this recipe. Serve it with chicken or toss in some black beans for a full plant-based meal. Let’s talk about cashews! A few fun facts: even though they’re actually a seed, they rank #4 on the list of the world’s most popular nuts (behind peanuts, almonds, and walnuts)! And while you probably have seen (or bought) “raw” cashews, they aren’t actually raw. That’s because truly raw cashews aren’t safe to eat. They contain the same substance as poison ivy (urushiol), which means they need to be processed to get rid of it. That being said, cashews contain most of the same benefits as other healthy nuts. They are a rich source of healthy fats and contain a good amount of fiber and protein! Plus they’re loaded with vitamins, minerals, and plant compounds that may protect your health. Like other nuts, though, moderation is the key, because they contain a lot of calories — just 1 ounce (28 grams) = 155 calories. 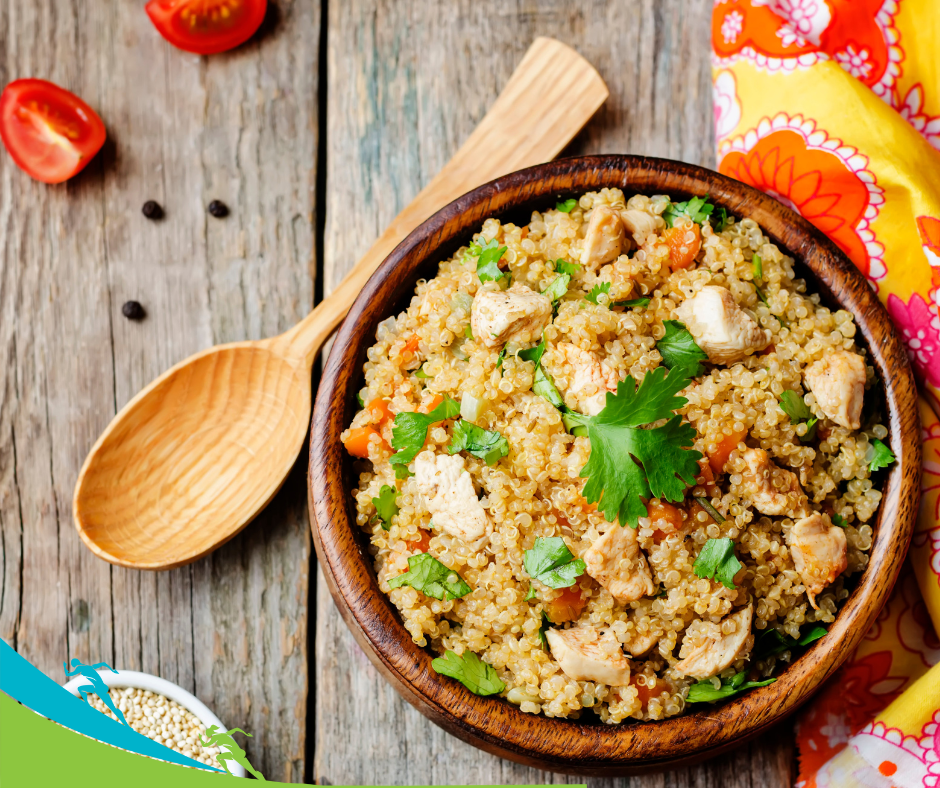 (makes 6 servings)
Reduce the heat to low, cover, and let simmer for 13-15 minutes, or until the liquid has been absorbed. Remove from the heat and fluff with a fork. Heat the olive oil in a medium skillet over medium-low heat. Add the cooked quinoa, pineapple chunks, and cashews. Cook until heated through, about 3-5 minutes. Stir in the pineapple juice (only as much as you’d like!), salt, pepper, and nutmeg, and let cook until warm and well-combined. Taste and adjust seasonings. Enjoy! Have you ever had Muhammara dip (aka red pepper & walnut dip)? Muhammara dip is a middle-eastern appetizer that is sweet, spicy, and satisfying. You can serve this simplified version at your holiday parties with veggie sticks for a light and healthier option. Its red color makes it festive – but the taste is what will make it a winner! Muhammara dip makes a great sauce for veggies and is a delicious sandwich spread. You'll love the flavours of this versatile dip that brings a burst of deliciousness to any occasion. 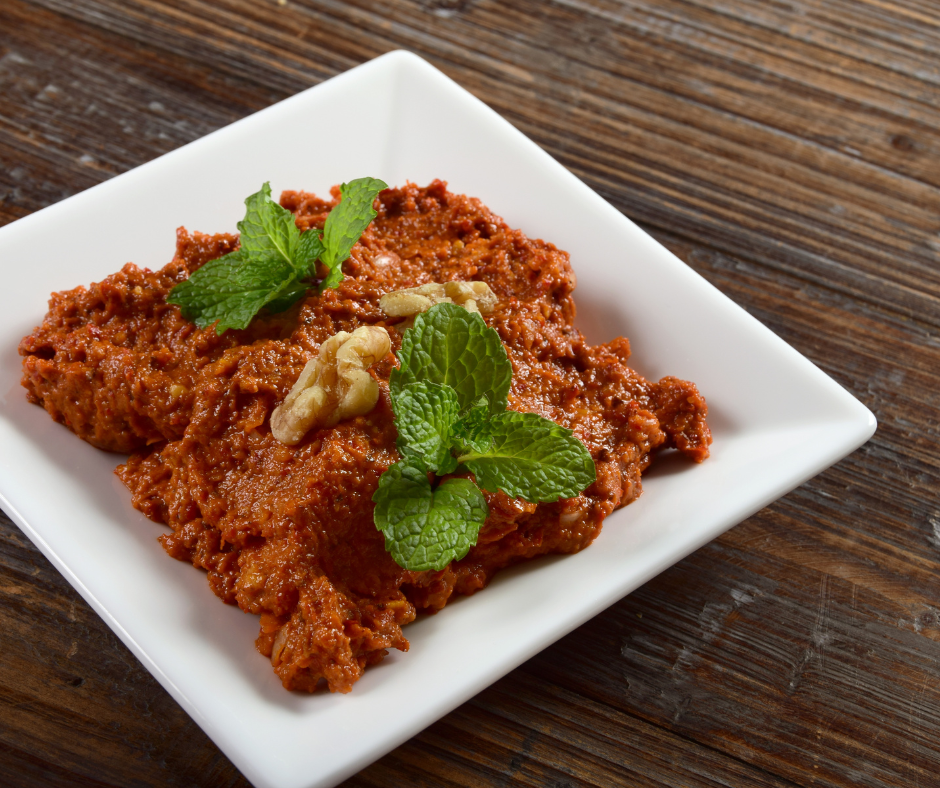 (makes 8 servings)
Place the pomegranate juice in a small saucepan over medium-high heat and bring to a boil. Lower the heat to medium and let simmer for about 5 minutes, until it reduces to about 2 Tbsp. Remove from heat and set aside to thicken and cool. Toast the walnuts in a nonstick skillet for about 2 minutes over medium-high heat. Set aside to cool. When cool, place the nuts and oats in a food processor and pulse until they are finely ground. Add the pomegranate juice, lemon juice, drained red peppers, cayenne pepper, and cumin, and process until it’s smooth. Keeping the processor running, slowly pour in the olive oil so it emulsifies. Add salt to taste. Scrape into a serving bowl. Can be served immediately but it’s even better after a few hours when the flavours have had a chance to develop. Enjoy! This recipe makes a fast & easy breakfast or lunch. The best part? You can customize these egg muffins any way you want — use frozen or fresh veggies... or add cooked turkey bacon, beans, or salsa.  (Makes 6 x 2-muffin servings)
Preheat oven to 375°F/190ºC. Coat a 12-cup muffin tin with nonstick spray. Set aside. Crack all of the eggs into a large bowl and whisk until blended. Stir in the onions, veggies, and cheese. Evenly spoon the egg and veggie mixture into the muffin cups. Place in the oven and bake for 15-18 minutes. The muffins are done when a toothpick inserted into their center comes out clean. Enjoy! When it comes to protein, chicken is often at the top of many people’s go-to lists. It's lean, versatile, and widely available, making it a staple in many kitchens. You probably already know that protein has numerous benefits for your body. It helps build muscle, strengthen bones, and keep you feeling full and satisfied long after you finish eating. But did you know that chicken also contains the amino acid tryptophan, which can boost your mood? That's right, not only is chicken nutritious, but it can also help improve your overall well-being. Chicken Breast vs. Thighs Both chicken breasts and thighs are excellent sources of protein, but portion sizes must be considered when incorporating them into meals. Chicken breast tends to have less fat and fewer calories per serving. A 3 oz (85 g) serving of chicken breast contains approximately 140 calories, 3 g of total fat, and 1 g of saturated fat. On the other hand, chicken thighs have slightly more calories and fat. A 3 oz (85 g) serving provides around 170 calories, 9 g of total fat, and 3 g of saturated fat. However, if you want to reduce the fat content in your chicken thighs, you can remove the chicken skin before cooking. Now that you know the nutritional benefits of chicken, it's time to put it into action with the quick and easy recipe below.  (makes 4 servings)
Place the chicken thighs in a baking dish. Drizzle the olive oil over them and add a sprinkle of salt & pepper. Bake for 20 minutes. Whisk together the honey, vinegar, and coconut nectar. Brush over the tops of the chicken thighs. Sprinkle the chicken with the sesame seeds and return to the oven to bake for 5-7 minutes. Serve & enjoy! This is SO much better than canned soup and it takes only a few minutes to make! If you prefer it less tomatoey – combine ½ cup (120 ml) each of chicken or veggie broth and water, and add it to the mixture with the diced tomatoes. 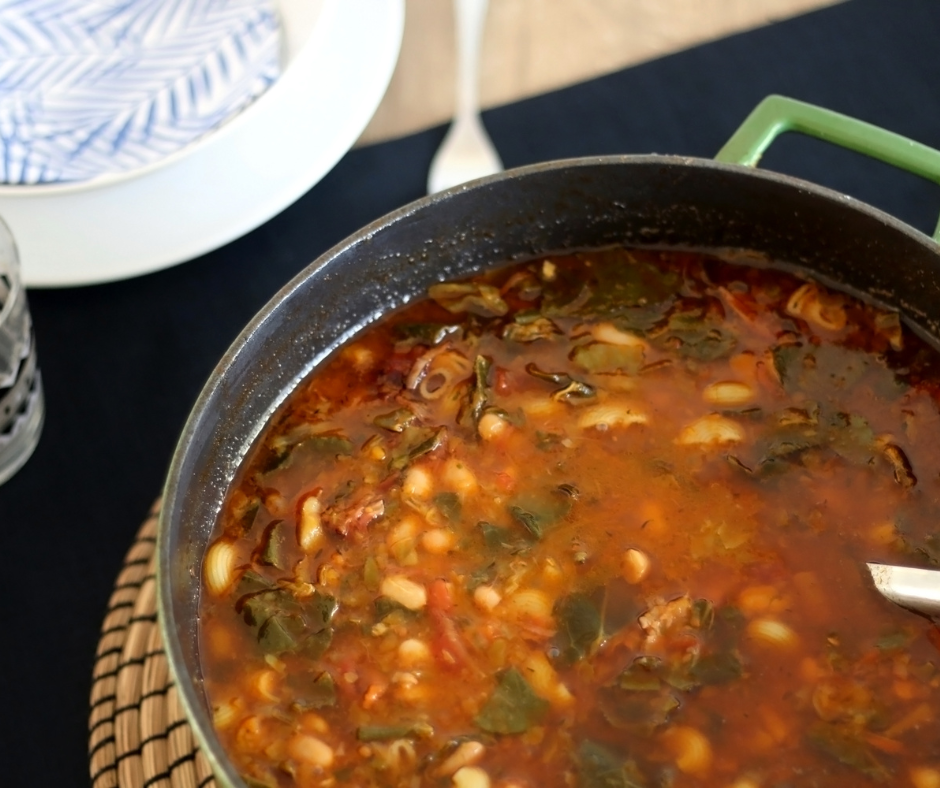 (makes 1 large or 2 medium servings)
Crush the tomatoes and add them and their juices to the soup pot, along with the beans. Simmer for 5-8 minutes, until the zucchini reaches your desired tenderness. Season with salt and pepper. Top with the pesto and serve. Enjoy! This recipe might become one of your staple go-to's because it’s fast, easy, and nutritious. You can easily whip up a batch on meal prep day and keep it in the fridge to serve as your starch/carb with chicken, fish, or steak. It also works great as a salad topper or the base for a plant-based meal. Brown rice used to be synonymous with the word “healthy”… until the low-carb revolution happened! But guess what? It can still be a healthy choice! It’s an inexpensive whole grain packed with fiber and a long list of vitamins, minerals, and antioxidants. Studies also show it is linked with heart health and better blood sugar control. Plus, it’s gluten-free. It’s a perfect meal prep choice — just steam a pot of it and keep it in the fridge until it’s time to eat! 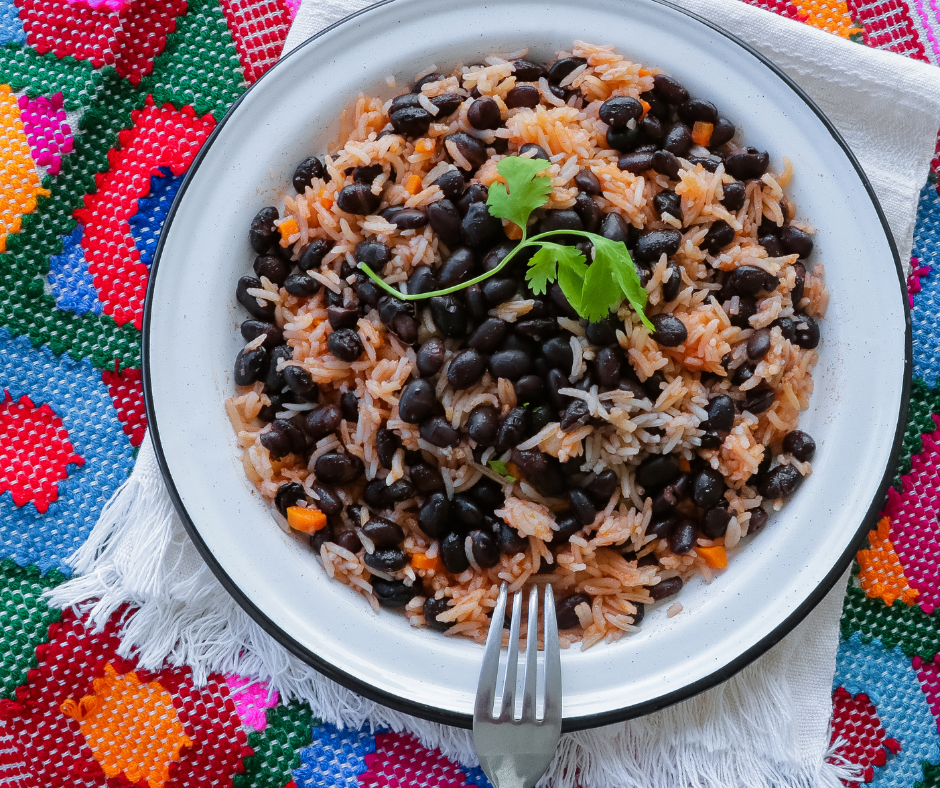 (makes 6 servings)
Heat the olive oil in a medium skillet over medium heat. Add the onion and cook until it becomes translucent, 3-5 minutes. Add the garlic and cook, stirring frequently, for 30 seconds. Add the beans and rice and cook, stirring frequently, until heated through, about 4-5 minutes. Stir in the cumin and salt & pepper to taste. Serve warm or keep in the refrigerator. Enjoy! Eggs are usually associated with breakfast, but this delicious recipe can pass as a satisfying lunch or dinner too. No matter when you eat it, it tastes like a special occasion meal (and bonus, it only takes a couple of minutes to pull together!). 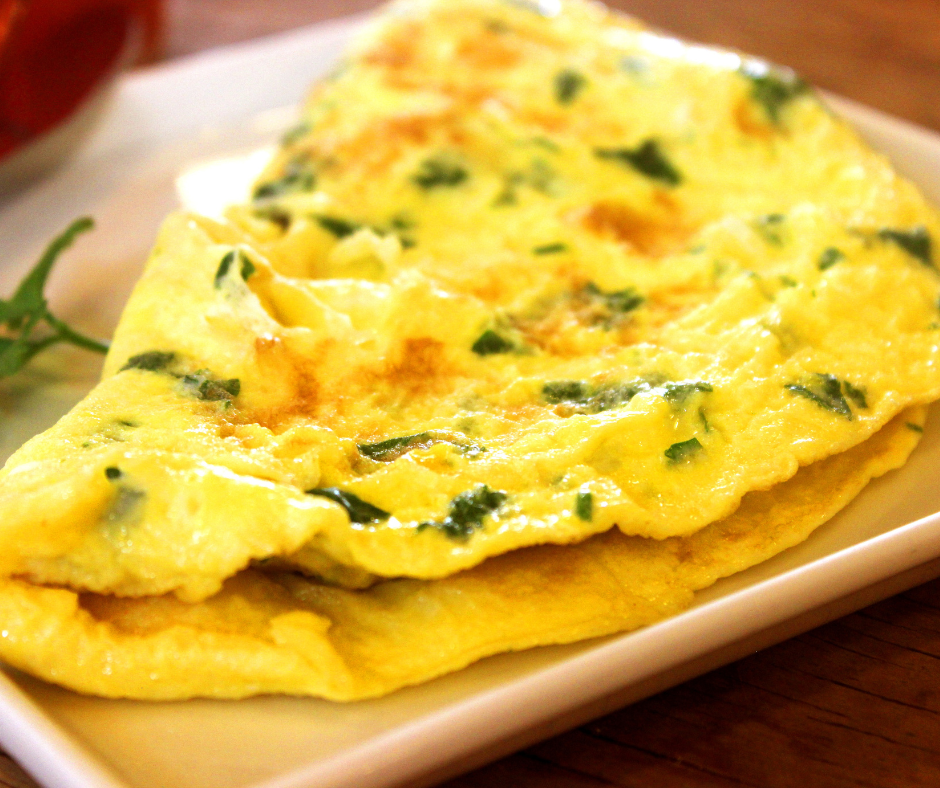 (Makes 1 serving)
Heat the oil in a small skillet over medium heat. Pour in the egg mixture. Cook until the bottom is set and the top is slightly runny – about 2 minutes. Carefully flip the eggs over and continue cooking until set, another 30-60 seconds. Place the eggs on a plate and top with the avocado slices, smoked salmon, and herbs. Serve and enjoy! This is a lunch you’ll look forward to! Serve this on top of a piece of sprouted grain bread, over salad greens, or in a wrap. If you’re trying to tame your sweet tooth, keep some grapes in your fridge if you want to have a healthy snack ready at all times! These little fruits are basically nutrient GIANTS! They’re packed with a huge list of vitamins, minerals, and plant compounds that may protect your health. Grapes are:
AND may help boost your immune system.  (makes 6 servings)
Sprinkle nuts over the top. You can serve this immediately (at room temperature) or chilled. Delicious! This recipe is for all the pumpkin spice fans out there! These walnuts make a great topping for yogurt, sprinkled over a smoothie bowl, or as a quick snack with a piece of fruit. You can swap the coconut oil for grass-fed butter or 1 egg white as the “glue” that makes the mixture stick to the nuts. 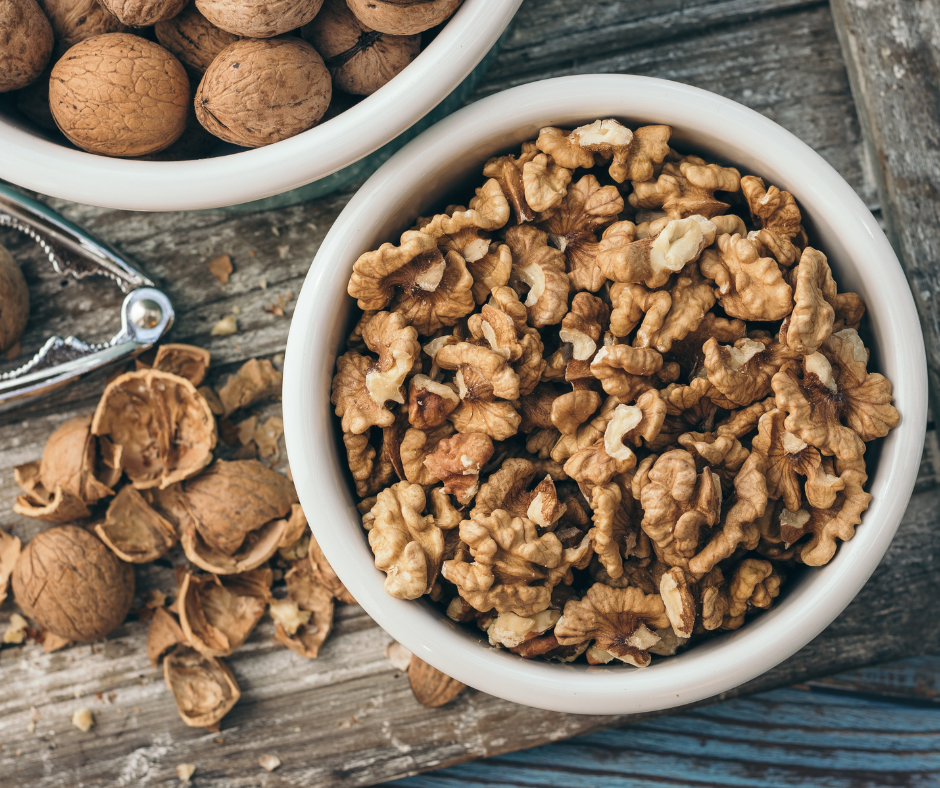 (makes about 16 servings)
Preheat your oven to 275ºF/135ºC. Line a baking sheet with parchment paper. In a large bowl, whisk together all the ingredients except the Walnuts. Add in the walnuts and stir to coat evenly. Spread in a single layer on the prepared pan. Place in the oven and bake for 30 minutes. Rotate the pan and cook for another 20-30 minutes. The nuts are done when they are dry to the touch and a little crispy. Let them finish cooling on the pan before removing. These nuts will keep in a covered container for about a week at room temperature (if they last that long!) Enjoy! I’ve kept the ingredients short in this tasty salad recipe, but feel free to add chopped carrots, avocados, your favourite lettuce, or any other veggies you have on hand. One of the healthiest oils on the planet is... OLIVE OIL! And if you’re like a lot of people, you might keep a bottle of it on your counter so that it’s always at hand! But did you know that’s actually not the best idea? It should be stored in a cool, dark, place. That keeps it away from light & heat — which can speed up oxidation, making the oil rancid faster. This would be a shame because olive oil is high in antioxidants, anti-bacterials, anti-inflammatories, and good-for-you fats. All of those micronutrients are linked with a lower incidence of stroke, diabetes, Alzheimer’s, cancer, and heart disease. For the best nutrition benefits, make sure you’re using PURE extra virgin olive oil. 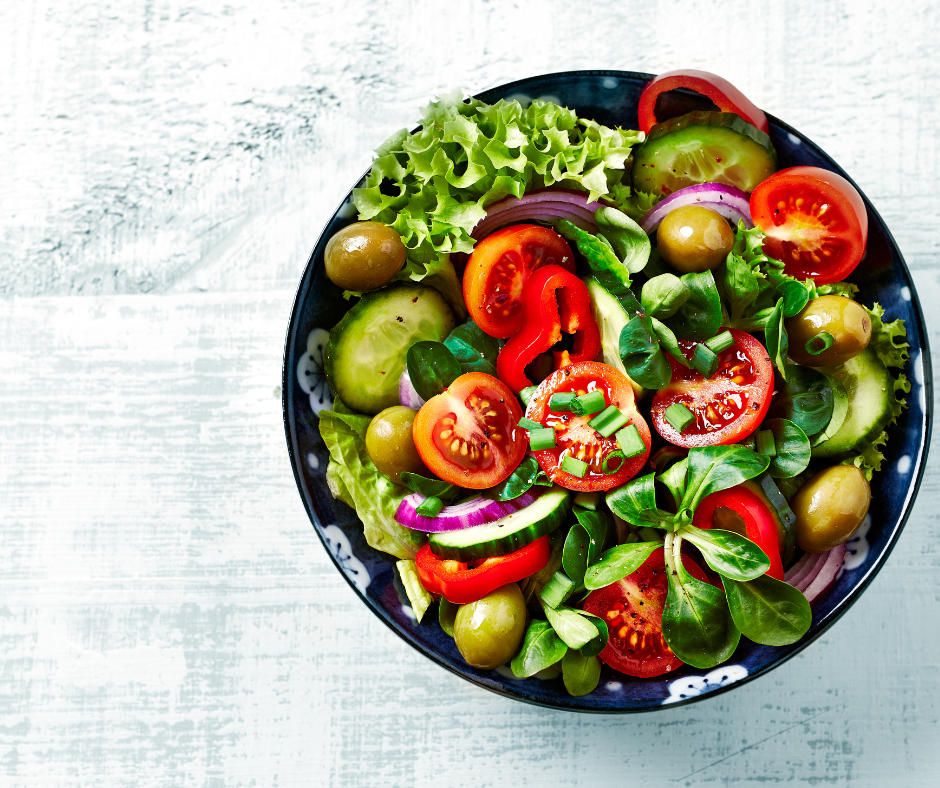 (makes 4 side dish salads)
In a small bowl, whisk together the oil, lemon juice, salt, and pepper. Pour over the veggies and toss to coat. Simple, fresh, and healthy! I’ve got another snack recipe for you today that’s almost TOO easy If you’re going to only eat 1 serving... wrap up the other half other avocado tightly in cling wrap BEFORE adding the liquid and store in the fridge for one day. When you’re ready to eat, just add the amino mixture and mash it up. Avocado trees can live 400 (or more!) years! Avocados are usually thought of as a delicious way to get in more healthy fats… I mean, hello guacamole, right? But they’re also loaded with fiber, magnesium, folate, and potassium. Plus, they’ve got lots of antioxidants and anti-inflammatories. All of that leads to a long list of possible health benefits, including lower cholesterol and triglyceride levels, lower blood pressure, better heart and gut health, and fewer vision problems related to aging. 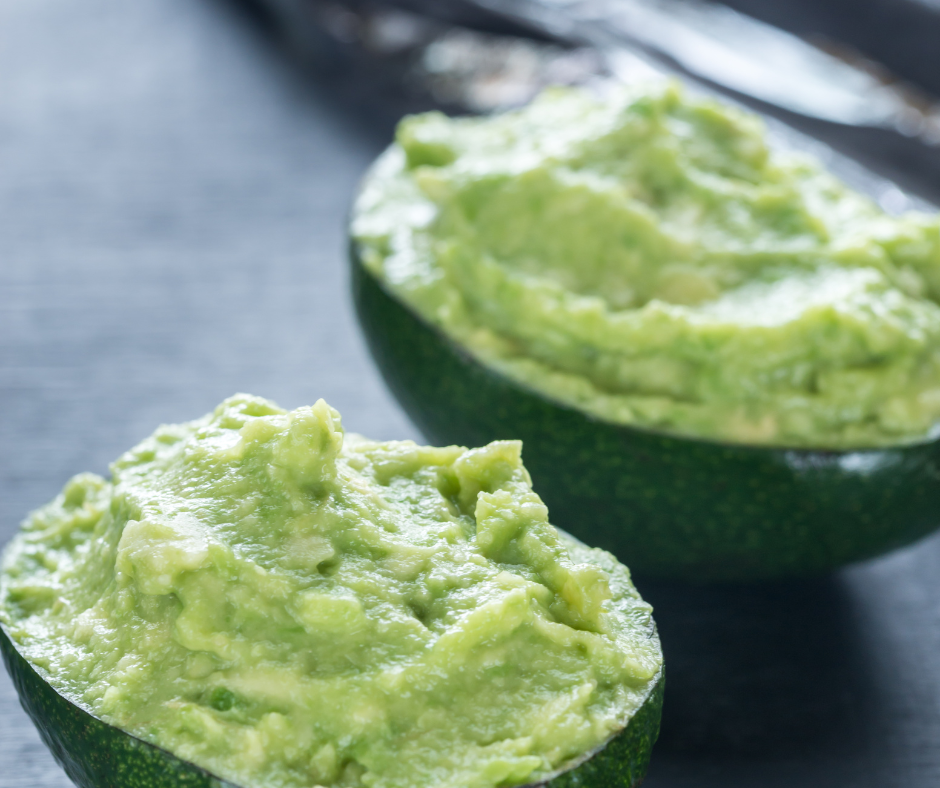 (makes 2 servings)
Sprinkle with the sesame seeds and mash the avocado and eat out of the shell. That’s literally IT. Enjoy! This one is ALWAYS a winner! It also makes a yummy breakfast, snack, or dessert. Boost the protein in this recipe by stirring ½ to 1 scoop of vanilla protein powder into the topping. “An apple a day keeps the doctor away”… right? I don’t know if that’s actually true, but I do know that apples are PACKED with nutrition. Just a few benefits:
There are thousands of different varieties of apples — it seems like more every year! They range in taste from tangy to sweet, so there’s an apple out there for almost everyone. 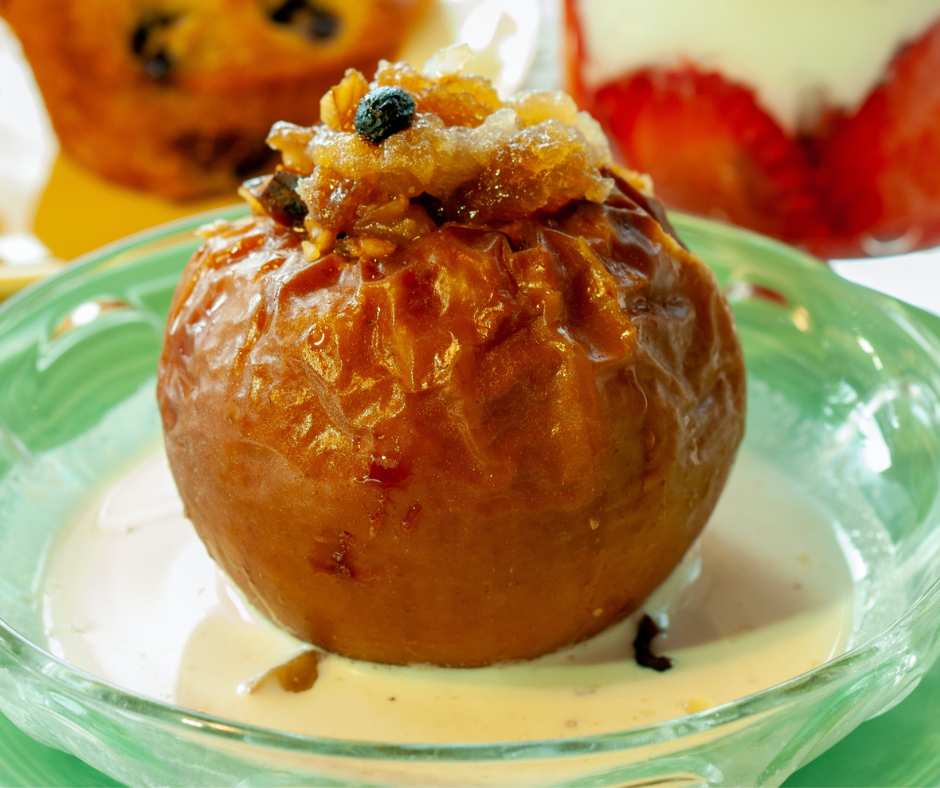 (serves 1)
In a small bowl, stir together the oats, sugar, and cinnamon and work in the butter or coconut oil using a fork or your hands – it should reach a crumbly consistency. Spoon into the center of the apple. Place in the oven and bake for about 30 minutes, until the apple is tender and the filling bubbles. Let cool slightly before eating. Enjoy! One of the things I love? Simple recipes that are fast and packed with flavor - and this one definitely delivers! It’s a great side dish, but if you want to make it a meal, just add some steak or salmon. Mushrooms have some pretty unique health benefits! A big example: because they absorb vitamin D from the sun while they’re growing, they pass it along to you when you eat them… making them one of the few natural food sources of this important micronutrient! Plus, mushrooms are loaded with antioxidants and other nutrients that offer protection against diseases like cancer. And they may also help you balance your blood sugar and gut health, and can be great for your thyroid and metabolism, too. Plus, their meaty “umami” flavour and texture make them a good addition to stir-fries, salads, and more! 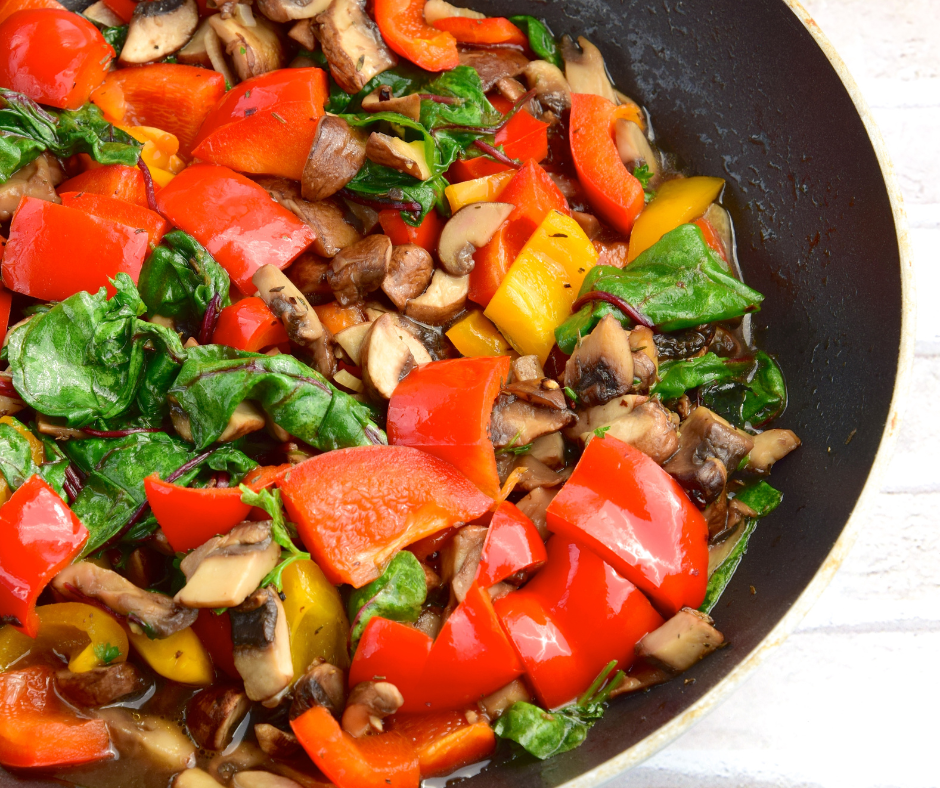 (makes 4 servings)
Heat oil in a large skillet over medium-high heat. Add the bell pepper and sauté for 3-4 minutes, and then add the onion and garlic. Continue sauteing until tender, then add the mushrooms and cook until they begin to soften and shrink, about 3 to 4 minutes. Toss in the spinach in batches and sauté until spinach is wilted Add the balsamic vinegar and stir until it is absorbed and then the white wine or apple cider vinegar. When it has reduced, remove it from the heat and season with a little salt and pepper. Serve and enjoy! Coconuts make two guest appearances in this recipe. For a vegan meal, serve this rice & beans dish with a side of broccoli or cauliflower. It also makes a great side dish for fish or chicken. COCONUT WATER has been pretty trendy lately… and for good reason! But first… coconut water is not the same as coconut milk. Coconut water is the liquid that’s found in the middle of a young, green coconut. As the coconut grows and ripens, some of that liquid remains while the rest becomes coconut meat. Cool, right? Fun Fact #1: Coconut water is 94% water with virtually no fat. Fun Fact #2: Coconut milk is about 50% water, which is mixed with coconut meat. And there are some good reasons that coconut water is so popular… It’s a solid source of potassium, other minerals, antioxidants, and electrolytes. And studies show that it can help balance blood sugar, as well as help protect your heart and kidneys. Plus, the electrolytes make it a good choice for a post-workout drink. If you buy it bottled, check the label to make sure it’s 100% coconut water and that it doesn’t contain added flavors or sugar. 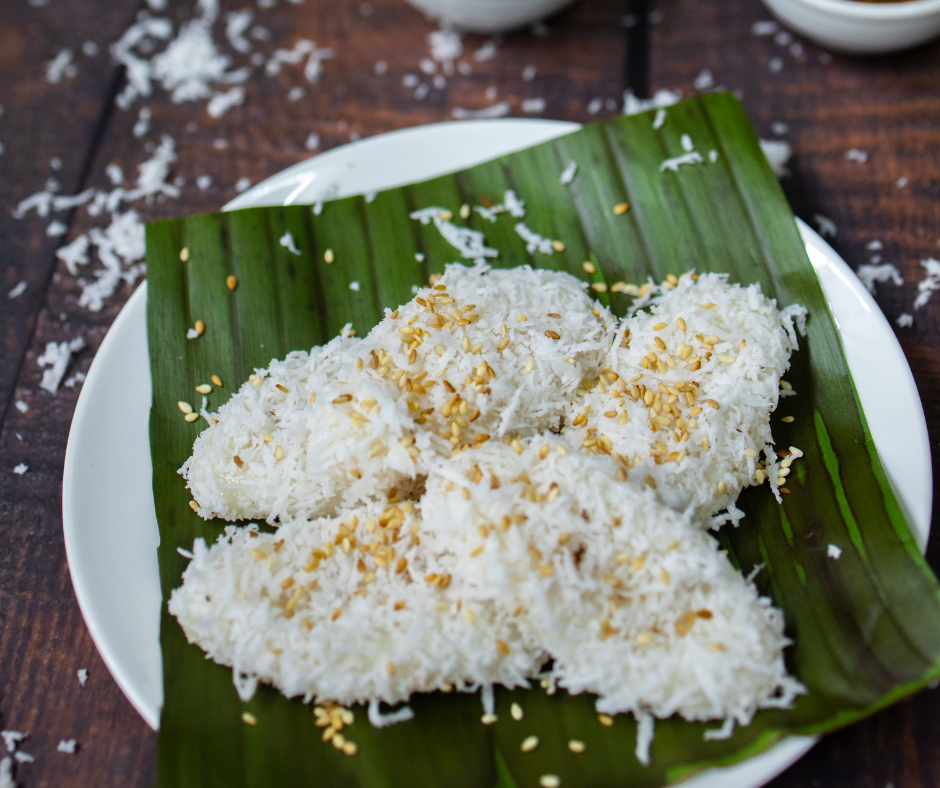 (Makes 6-8 servings)
Reduce the heat to a simmer and cover, cooking for 5 minutes. Add the lentils and cook for 40-45 minutes, until the liquid is absorbed. Remove from the heat and let sit, covered, for 5 minutes. Fluff the rice & lentil mixture with a fork and serve. Besides being super delicious, this recipe is a winner because it’s company-worthy... And it takes just a couple minutes to throw together … and uses just one pan! I recommend a nonstick skillet for this dish. When you think of “EGGS”… chances are you think “protein.” And yes, they’re a great choice for that… But they also have compounds that support the health of your brain and eyes. Even though they contain cholesterol, research shows they don’t appear to play a role in high cholesterol levels. One of the best things about them? They take just a few minutes to cook! You can make a batch of hard-boiled eggs ahead of time for a quick grab-and-go snack. Sorting through all the different types of eggs at the grocery store can be confusing! Look for pastured eggs — which means hens are allowed open access to the outdoors, and they eat a more natural diet. That means more nutrition for you. If those aren’t possible, try omega-3 eggs, followed by free-range, cage-free, or organic. 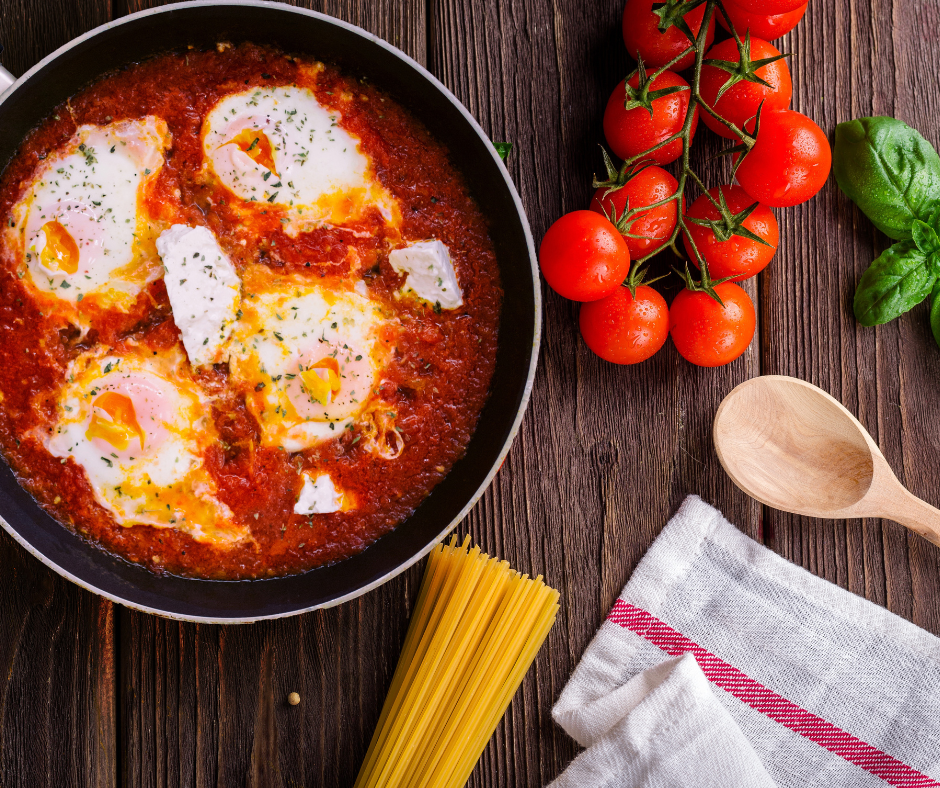 (makes 4 servings)
Heat oil in a nonstick ovenproof skillet over medium heat. Add the spinach and season salt and pepper. Sauté for 2-3 minutes. Stir in the marinara sauce and bring to a simmer. Make 4 “wells” in the marinara sauce using a spoon and crack an egg into each well. (Pro tip: crack the egg into a small bowl and then pour into the well to avoid getting any shell in the sauce). Place the skillet in the oven and bake for about 20 minutes until the egg whites are set but the yolks are still soft. Serve with quinoa or rice for a full meal. Enjoy! This tasty pudding makes a hearty breakfast that’s packed with fiber and healthy fats. Plus, it’s a GREAT use for leftover quinoa. You also can use store-bought crispy quinoa if you want to add some “crunch.” It wasn’t that long ago that quinoa was an exotic grain that most of us hadn’t heard of! Now it’s a healthy “superfood” staple that a lot of people keep in their kitchens. Quinoa contains several important minerals – including magnesium, iron, and zinc – and it may help lower blood sugar levels. It’s also a good source of fiber and antioxidants. Even though it’s considered a grain, it’s not really a grain (it’s a seed) – and that means it’s it doesn’t seem to bother most people who are sensitive to gluten. I’ve got a quinoa tip for you! If you’ve tried quinoa in the past and thought it tasted bitter, it was probably because it was still coated with saponins, a chemical produced by the plant to protect itself when it’s growing. Make sure you rinse the quinoa before you cook it! I know this can be a little tricky because the seeds are so small… but I have another tip for you: Place the tiny seeds in a coffee filter, and then put the filter in a sieve or colander before you rinse. 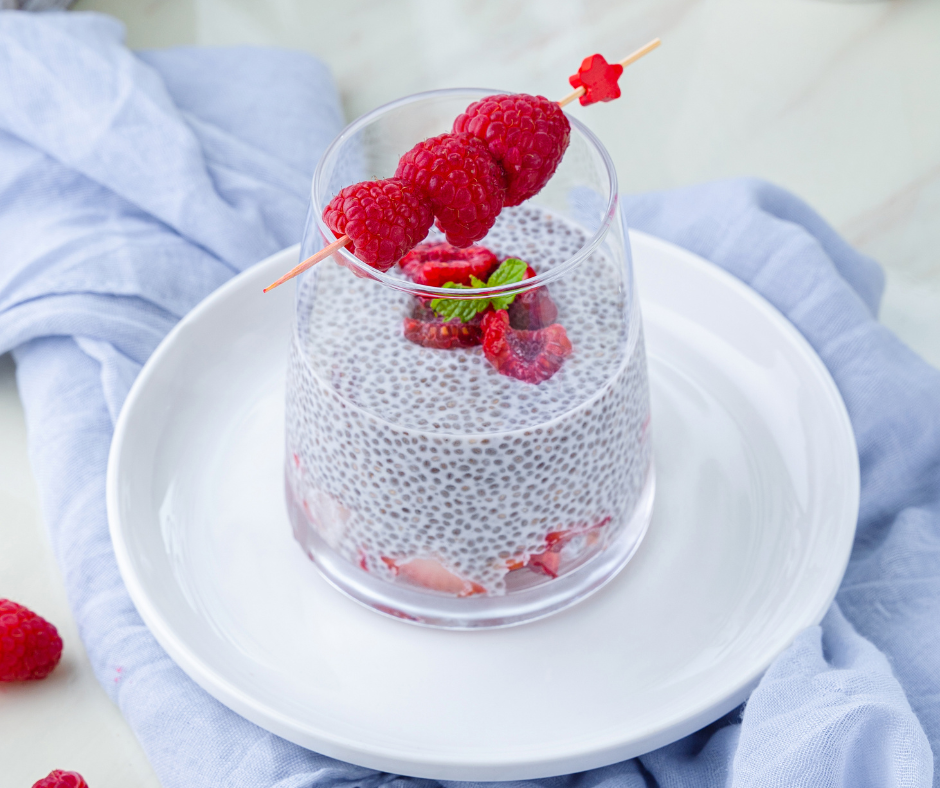 (serves 2)
That’s it! Enjoy the next day! HIGH-PROTEIN GRAB & GO SNACK Here’s a sweet way to sneak in some extra veggies. These energy bites are packed with deliciousness and nutrition – without any cooking! CARROTS: These party platter favourites are one of the most nutritious veggies out there as they are loaded with vitamins, minerals, and antioxidants. They help fight cancer, lower your blood pressure, keep your immune system strong, help your bones stay healthy, AND help protect your vision. If you eat more than 10 medium-sized carrots a day for a few weeks, you’ll build up too much beta-carotene in your body and develop a condition called carotenemia… and your skin will start to turn orange! Carrots are great in soups, salads, stews, stir-fries, and casseroles. You can eat them raw, steamed, roasted, baked, and even juiced.  (makes about 18)
Place the dates, oats, walnuts, and chia seeds in a food processor. Pulse until they are combined. Add the remaining ingredients and process until everything is chopped and the texture is almost smooth. Please note; if you’re using the protein powder, you might need to add water to get the proper consistency – just a couple of drops at a time! Create the balls by scooping out 1 tablespoon at a time and rolling until a ball is formed. These will keep covered in an airtight container in the fridge for about a week, or in the freezer for 3-4 months. Yum! Think of this as a healthier version of Nutella! Are you drooling yet?! Use it on sprouted grain bread or rice cakes for a fast, easy, and delicious snack. To cut back on the sugar, experiment with the sweetness level, starting with just 1½ Tbsp and adding more if necessary. Here’s a little mind-blowing banana fact for you: Banana trees aren’t really trees. They’re an herb and a distant relative of ginger! And like most herbs … bananas have some pretty amazing benefits. First, they’re packed with potassium, which most of us don’t get enough of. (Great for healthy blood pressure, kidney function, and heart health.) They’re also linked with better blood sugar control. If they aren’t too ripe, they also have a good amount of insoluble fiber and resistant starch – which is a good-for-your gut prebiotic. The more ripe a banana is, the lower its fiber content. If you have a sweet tooth, snack on bananas instead of junk foods with added sugars. Add them to plain Greek yogurt or give them a schmear of almond butter. 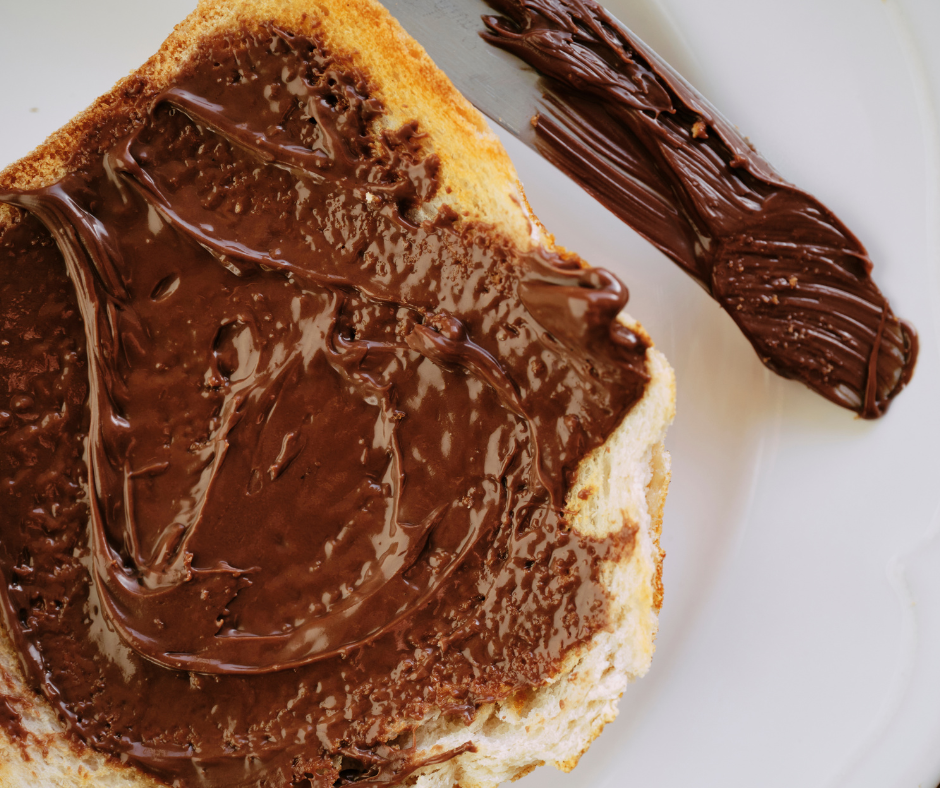 Makes 16 servings
Scrape into a glass container. Don’t get your face stuck in the jar! This keeps best in the refrigerator. Enjoy! Boost the nutritional value (and reduce the post-carb blahs) with this take on French toast… which is a healthier choice for your next brunch! The healthiest bread you can eat is… drumroll please… SPROUTED GRAIN BREAD! Aka “Ezekial bread.” Have you tried it yet? It’s made from grains (seeds) that have begun to germinate or sprout, which: 1) makes it easier for your body to digest it and 2) makes it even more nutritious! When grains or seeds sprout, it breaks down their starches — which translates into lower carbs and HIGHER fiber and protein content. That means that it’s higher in protein, fiber, and antioxidants than conventional bread, as well as vitamins B, C, E, and folate. You can usually find it in the freezer section at the grocery store. 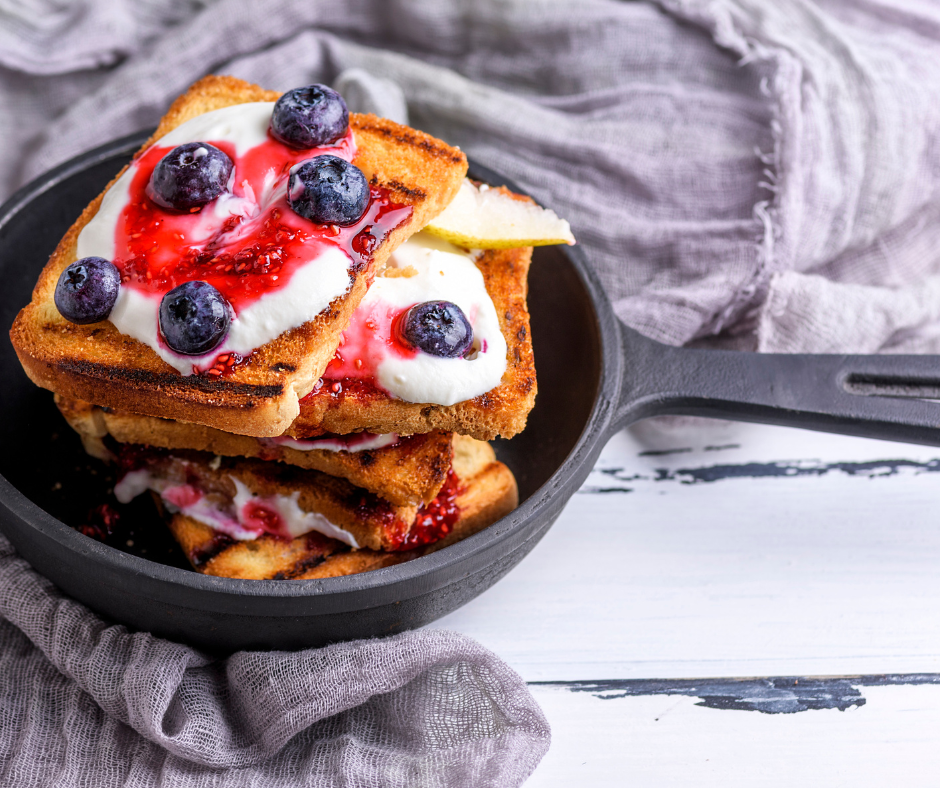 (makes 2 servings)
Place all of the ingredients except the bread (and toppings) into a large mixing bowl and mix well. Dip each slice of bread into the egg mixture, making sure both sides are well covered. Place the bread in the skillet and let cook for about 5 minutes on each side. The bread should be lightly browned and slightly crisp. Place each slice of toast on a plate and add toppings. Enjoy! This hearty recipe takes just a few minutes to throw together and is PACKED with fiber and plant-based protein. Serve it as-is, or make a heartier meal by spooning it over sweet potatoes, rice, or quinoa. Did you know that there’s an annual festival in Spain… where people throw 150,000 TOMATOES at each other?! Which is kind of a waste (but also probably fun), because tomatoes are so good for you. They’re a top source of lycopene, an antioxidant linked to a lower risk of heart disease and cancer. Interestingly, lycopene may also help protect you from the sun’s ultraviolet rays! But that’s not their only claim to nutrition fame – they’re also rich in vitamin C, potassium, folate, and vitamin K. Eat them in a sauce; in ketchup, salsa, and soup; raw in salads; roasted… and they are AMAZING sliced just after picking from the garden, topped with a sprinkle of sea salt. Yum! 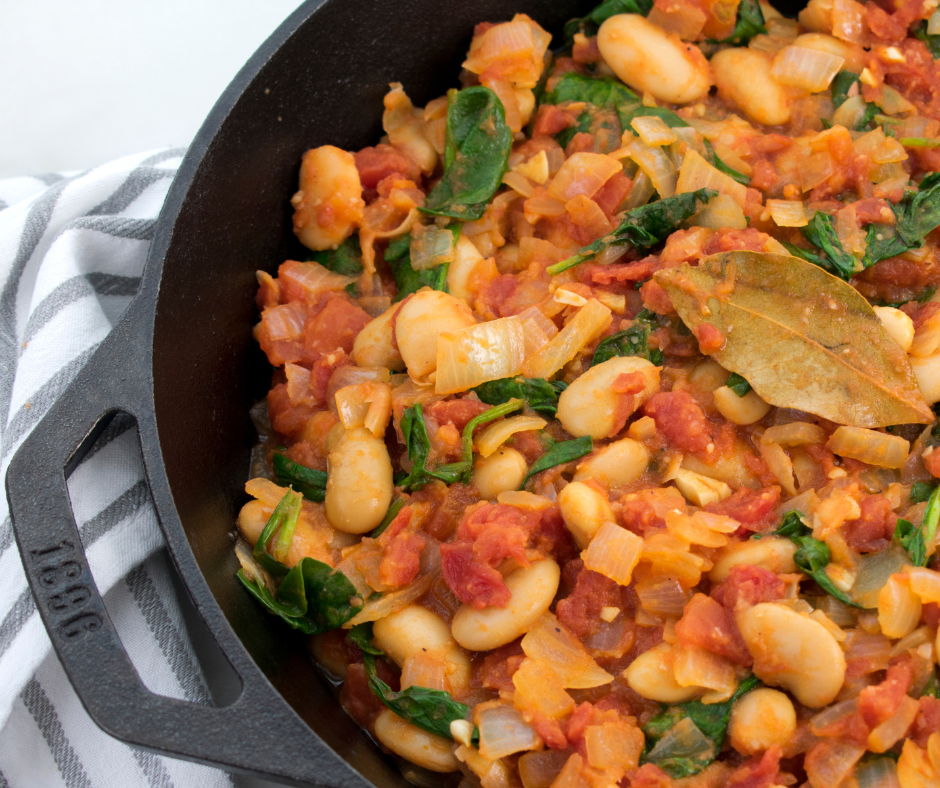 Serves 4
Add the tomatoes, basil, and salt and cook for about 4 minutes. Add the rest of the ingredients and let cook for another 10-15 minutes, until the liquid reduces by at least half. Ladle it over rice, quinoa, or sweet potatoes. Simple, delicious, easy! You really can’t go wrong with this recipe, which makes a tasty comfort food meal in just a few short minutes. Get creative! Mix up the veggies (try it with cauliflower, or add some sliced carrots), and even add some shredded chicken if you want. Have you tried crunchy chickpeas yet? So good! Chickpeas are a nutty little legume that’s one of the most popular sources of plant-based protein. There’s a good reason for all the hype – the protein quality may be better than other legumes. They contain all of the essential amino acids except one, methionine. They are packed with fiber, which means they are good for gut health. Plus, they may help balance blood sugar levels. Chickpeas also are a good source of choline, which supports your metabolism, memory, and mood! On a practical level, they are also inexpensive and taste amazing in everything from salads to Indian food to hummus to pasta and soups! 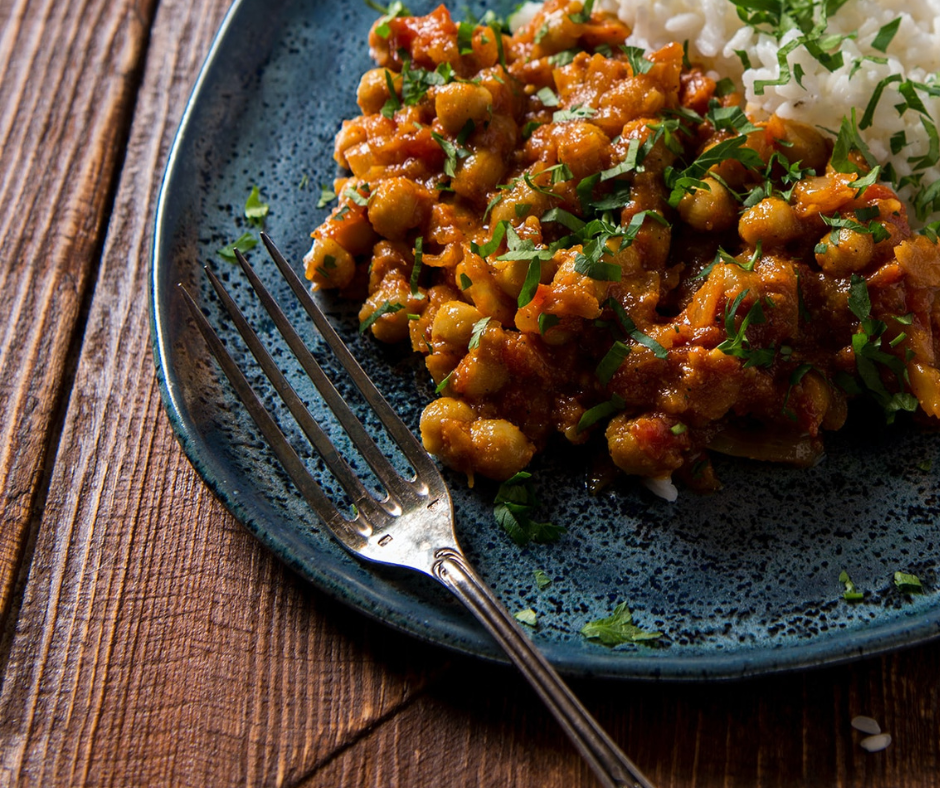 (serves 3)
Add the coconut milk and let simmer for another 5-7 minutes, until the broccoli begins to soften. Whisk in the curry paste until it is blended into the coconut milk and then add the chickpeas. Continue to cook until the coconut milk reduces and the chickpeas are heated through. Serve and enjoy! Cookies for breakfast? Yes, please! This recipe also makes for a healthier option instead of traditional cookies. There are a lot of ways – and reasons! – to add flaxseed to your diet! The reasons: They are loaded with healthy fats, fiber, vitamins, and minerals that may help protect your heart, lower your risk of stroke, improve digestion, and lower cholesterol. Plus, flaxseed has been proven to help lower blood pressure… and it might also help lower your blood sugar, too. It also contains lignans, which may help prevent certain cancers (prostate & breast). Sprinkle some over your salads… into your oatmeal, smoothies, or casseroles… or add them as a binder for meatloaf. NOTE: be sure to use ground flaxseed (or flax meal), as whole flaxseed can be hard to digest and you won’t get as much benefit. 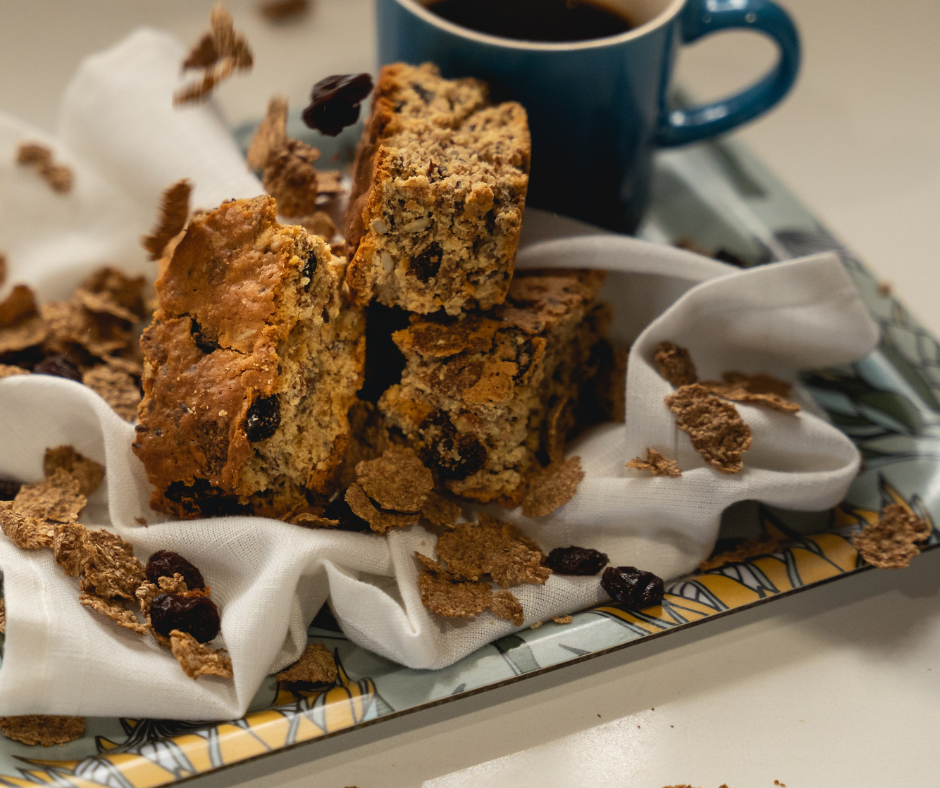 Makes 12 cookies
Preheat your oven to 325°F/160ºC. Spray the cups of a 12-cup muffin pan with baking spray. In a medium bowl, combine the nut butter, milk, sugar, water, vanilla, and pumpkin pie spice. Next, add the flaxseed and raisins and stir until well combined. Place equal amounts of batter into the 12 muffin cups and bake in the oven for about 20 minutes. They’re done when the tops are dry and barely firm and have turned golden brown. Remove from the oven and let cool in the muffin pan for about 10 minutes before removing. Run a knife around the edges of the cookies to loosen them from the pan, and finish cooling on a wire rack. Enjoy! |
Categories
All
Author BioNatatia Gemmell. |
 RSS Feed
Functional Performance Fitness
|
Settlers Ridge Centre 275 Brockville St, Unit 14 Smiths Falls, ON K7A 4Z6 Phone: (613) 205-1234 Email: [email protected] Staffed Gym Hours Monday - Friday: 8 am - 8 pm Saturday: 8 am - 12 pm 24 Hour Gym 24 hour with key fob access Privacy Policy Terms of Use |