|
Here’s a surprisingly easy dessert that happens to be low in added sugars , and makes a healthy dessert, 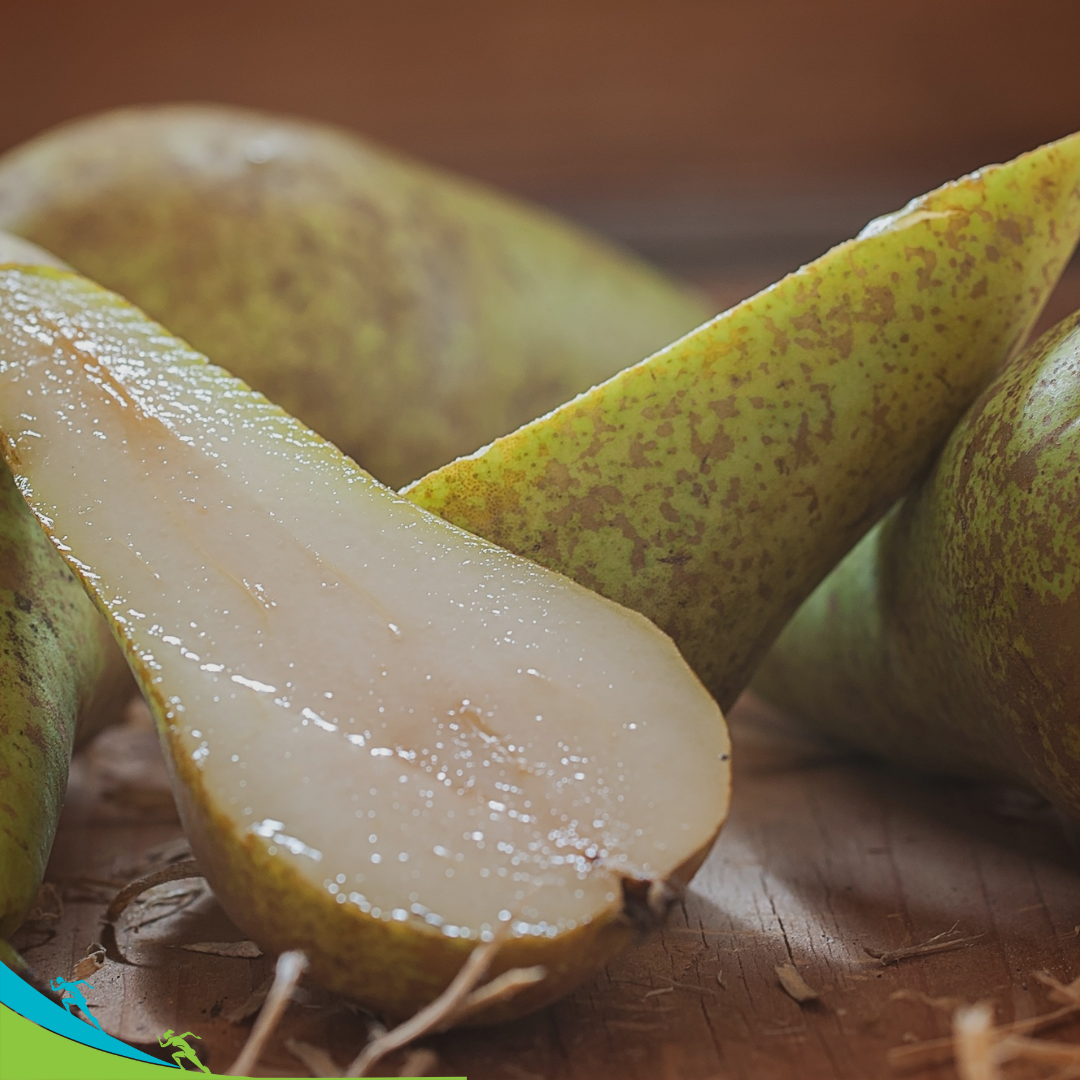 (serves 4)
Spiced Chocolate Sauce
Poach the pears: Peel the pears then cut them in half lengthwise, then remove their cores. Place them cut side down in a saute pan. Pour in the apple juice, wine, and cinnamon sticks. Place the pan on medium-high heat and bring the liquid to a simmer. Cover and let cook for 5-7 minutes, until cooked through but firm – poke them with a fork to test. Flip the pears over and cook another 1-2 minutes. Using a slotted spoon, remove the pears from the pan and onto serving plates. Place the chocolate and spices in a microwave-safe bowl and place in a microwave. Heat until smooth, stirring every 30 seconds, until melted. Drizzle over the pears to serve.
0 Comments
I *almost* feel guilty sharing this with you as a recipe when it only contains one ingredient and requires no cooking.:) Persimmons have a sweet, honey-like flavour when it is fully ripe. It is packed with vitamin A, essential for eye health; it contains antioxidants that can reduce stress and inflammation and help keep cholesterol and blood pressure in check. When making this recipe, double-check what kind of persimmon you are buying (Hachiya or Fuyu) because it makes a difference in how you make this recipe. Both options are listed in the instructions. 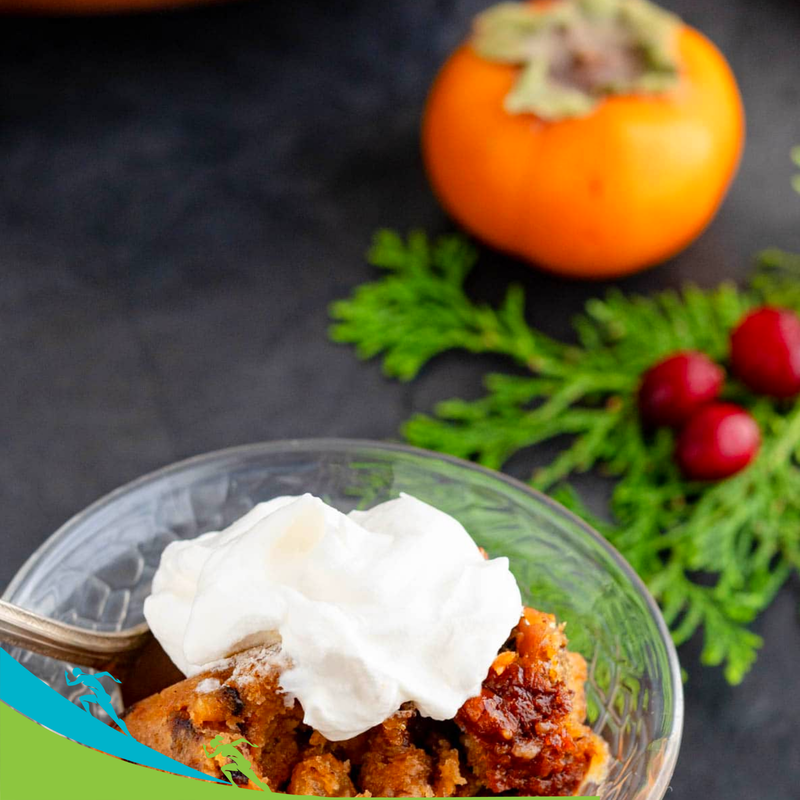 (makes 1 serving)
If you are using a Hachiya persimmon, it should be very ripe. Wash it well, then place it on a small plate, stem-side down. Let freeze for about 2 hours, until it’s firm but not frozen through. If you are using a Fuyu persimmon, it should be fairly firm when you freeze it. Wash well and place it on a small plate, stem side down, and freeze for at least 8 hours. To serve either type, remove the stem (using a spoon for the Hachiya or a knife for the Fuyu) and spoon out the fruit inside. Eat and enjoy the custard-like fruit, and top with optional coconut cream. This is a GREAT alternative for those days you want a sweet treat, but don’t want to splurge. These sausage patties are absolutely delicious! They make a great weekend breakfast — or you can whip up a batch as part of your meal prep and enjoy them all week long! When you form the patties, make sure the blueberries are tucked safely inside. Otherwise, during cooking, they can end up in the pan instead of in the sausage patties!  (makes 8 sausage patties)
Place the turkey, garlic, maple syrup, spices, salt, and pepper in a large bowl and mix together until combined. Gently add the blueberries, stirring until they become incorporated into the meat mixture. Divide the meat into 8 equal-sized portions (divide in half, then in half, and in half again), and form into patties about 1 cm thick (about ½ inch). Heat the oil in a nonstick skillet over medium heat. When it’s hot, add the sausage patties and cook for 4-5 minutes on each side (until they are browned and cooked through). Yum! Serve with your favorite toast or with eggs (or both) The nutrients in tofu will power up your immune system, boost collagen production, fight heart disease and some forms of cancer, and even keep your skin looking young and supple. Roasting gives the tofu a meaty texture. These tofu cubes are delicious in salads and make an excellent base for tacos! You can find liquid coconut nectar at most grocery stores. It’s a great alternative to soy sauce, which has more sodium (even the low-sodium varieties) and gluten. 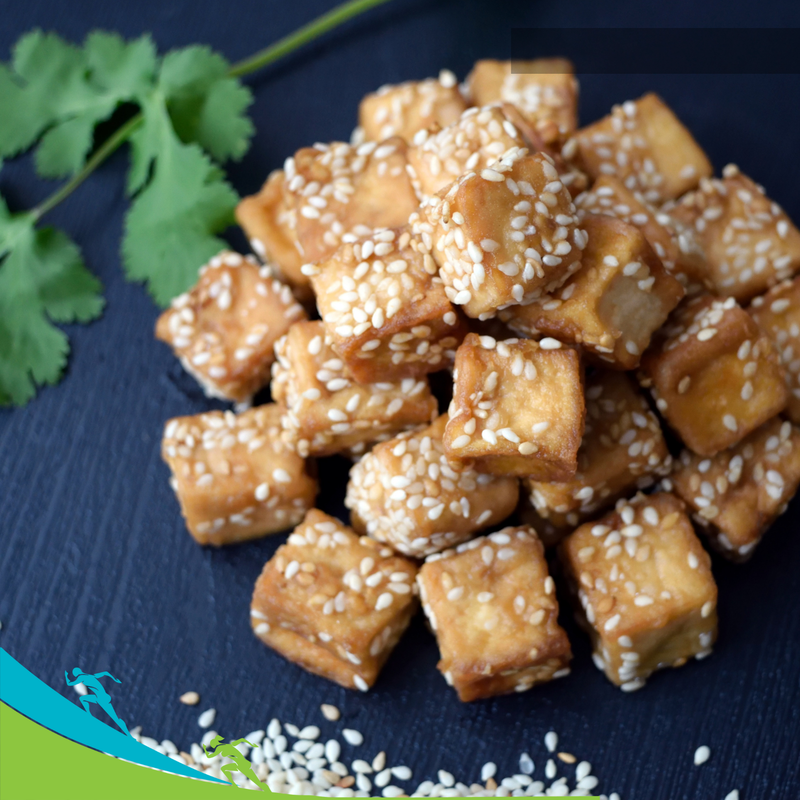 (makes 4 servings)
Pat the tofu dry. Cut into ½”- to ¾”-inch (1½- to 2-cm) cubes. Combine the coconut aminos, lime juice, and sesame oil in a large resealable bag, and then add the tofu. Seal it firmly and toss it gently to combine. Let sit in the refrigerator for 2-4 hours to marinate, stirring a few times. When you’re ready to roast your tofu, preheat your oven to 450ºF/230ºC. Prepare two baking sheets with a light coat of non-stick baking spray. Remove the tofu from the bag using a slotted spoon, and spread the chunks out, making sure they don’t touch. Roast for 20-25 minutes, flipping them about halfway through for even cooking. They will be golden brown when they are done. Easy peasy! It really doesn’t get much healthier than this broccoli bisque! This veggie-packed lunch recipe is clever because you make your own stock while cooking it. This bisque is 100% plant-based as-is If you’d rather replace the nutritional yeast with pecorino or freshly grated parmesan cheese. 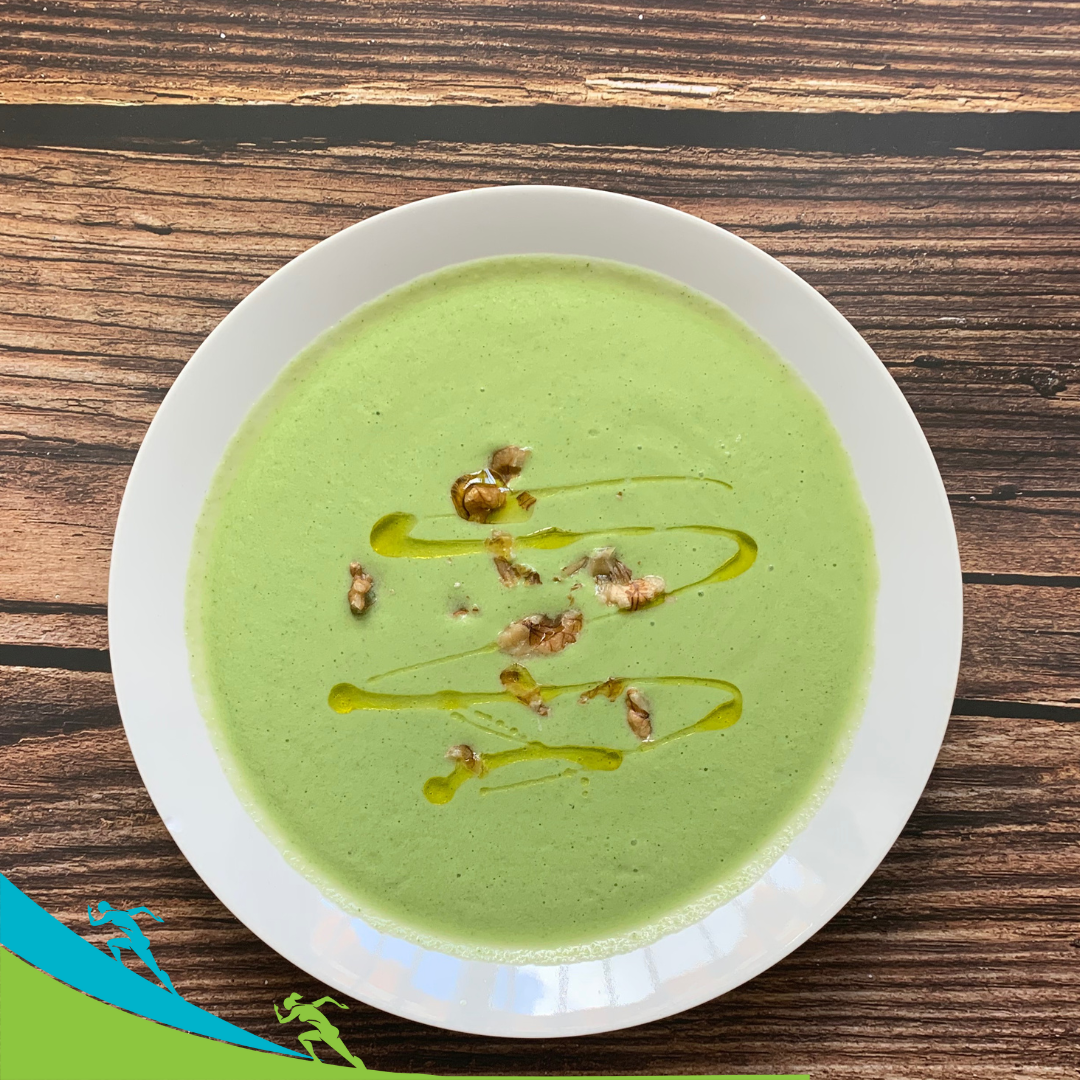 (makes 2 servings)
Heat the oil in a stock pot and add the onion, sauteeing until it starts to caramelize. Add the broccoli, cauliflower, carrot, and basil, season with salt, and then cook, stirring constantly, for 3-4 minutes. Add the water and bring it to a boil. Reduce heat, cover, and let simmer until the vegetables are tender, 20-25 minutes. Carefully drain the vegetables using a colander, making sure to save 2 cups of the cooking fluid. Place the cooked vegetables into a high-speed blender and add 1 cup of your cooking liquid. Blend until it’s smooth. You may have to work in batches. If you want a thinner bisque, add more of the saved liquid. Pour the bisque back into the pot and heat up, stirring in the nutritional yeast—season with salt and pepper. Serve warm with sprouted grain bread. You may want to save this recipe for any leftover turkey over the holidays. This recipe is clean and lean, and it might become one of your favourites for make-ahead/meal prep lunches and the kids will LOVE it! 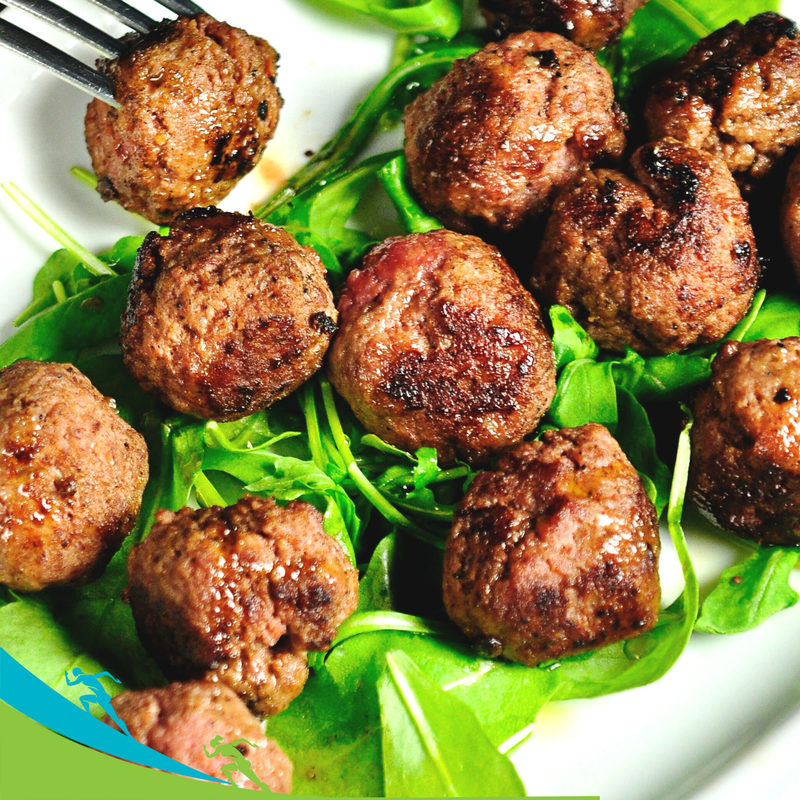 (makes 12 meatballs/4 servings)
Preheat your oven to 400ºF/200ºC and line a rimmed baking sheet with foil. Spray the foil with nonstick cooking spray. In a medium mixing bowl, place all the ingredients. Mix them gently until just combined. Roll the mixture into 12 x 2” (5 cm) balls. Place the meatballs on the foil and bake until browned, about 15-20 minutes. If you are using a thermometer, the internal temp should read 165 degrees. Enjoy! If you love quesadillas, this is a great way to enjoy holiday leftovers … and switch it up from the go-to turkey sandwich. If you have some leftover fresh sage, chop up 1-2 leaves and sprinkle them over the tortillas before you fold them over. Delicious!  (serves 1)
Lay tortillas on a sheet pan that has been sprayed with nonstick spray, or on a foil-lined toaster oven pan. Spread the cranberry sauce over half of each tortilla, and then top with turkey and goat cheese. Fold over the tortilla to form a half-circle. Cranberry sauce is one of my favourite delicious sauces this time of year. It is a terrific source of antioxidants, offering unique anti-inflammatory properties that make them popular in traditional herbal medicines that are used to this day. Raw cranberries have a sharp, bitter flavour, which is why they’re usually dried, stewed, jellied, or juiced. And they make a delicious salad topper! This recipe is made from simple whole food ingredients, it’s easy to throw together, and it’s delicious as a topper for chicken or turkey, or in sandwiches. You can even stir it into Greek yogurt or oatmeal! 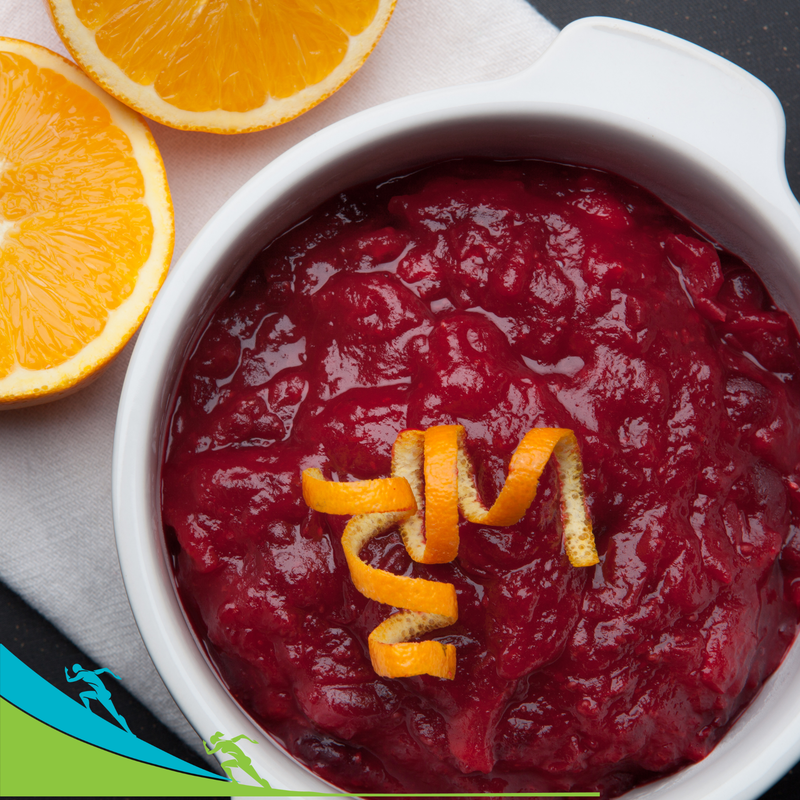 Makes 4 ½-cup servings
Using a strainer, rinse the cranberries and place them in a medium pot. Stir in the maple syrup, water, and orange juice, and add the cinnamon stick. Heat over medium-high heat until the sauce reaches a boil. Lower the heat to medium-low and let the berries simmer for about 10-15 minutes until the mixture is syrupy. It’s normal for the cranberries to pop as they cook. Remove from heat and allow to cool. Serve at room temperature or slightly warm. Enjoy! This recipe makes a fast & easy breakfast or lunch. The best part? You can customize these egg muffins any way you want — use frozen or fresh veggies ... or add cooked turkey bacon, beans, or salsa. 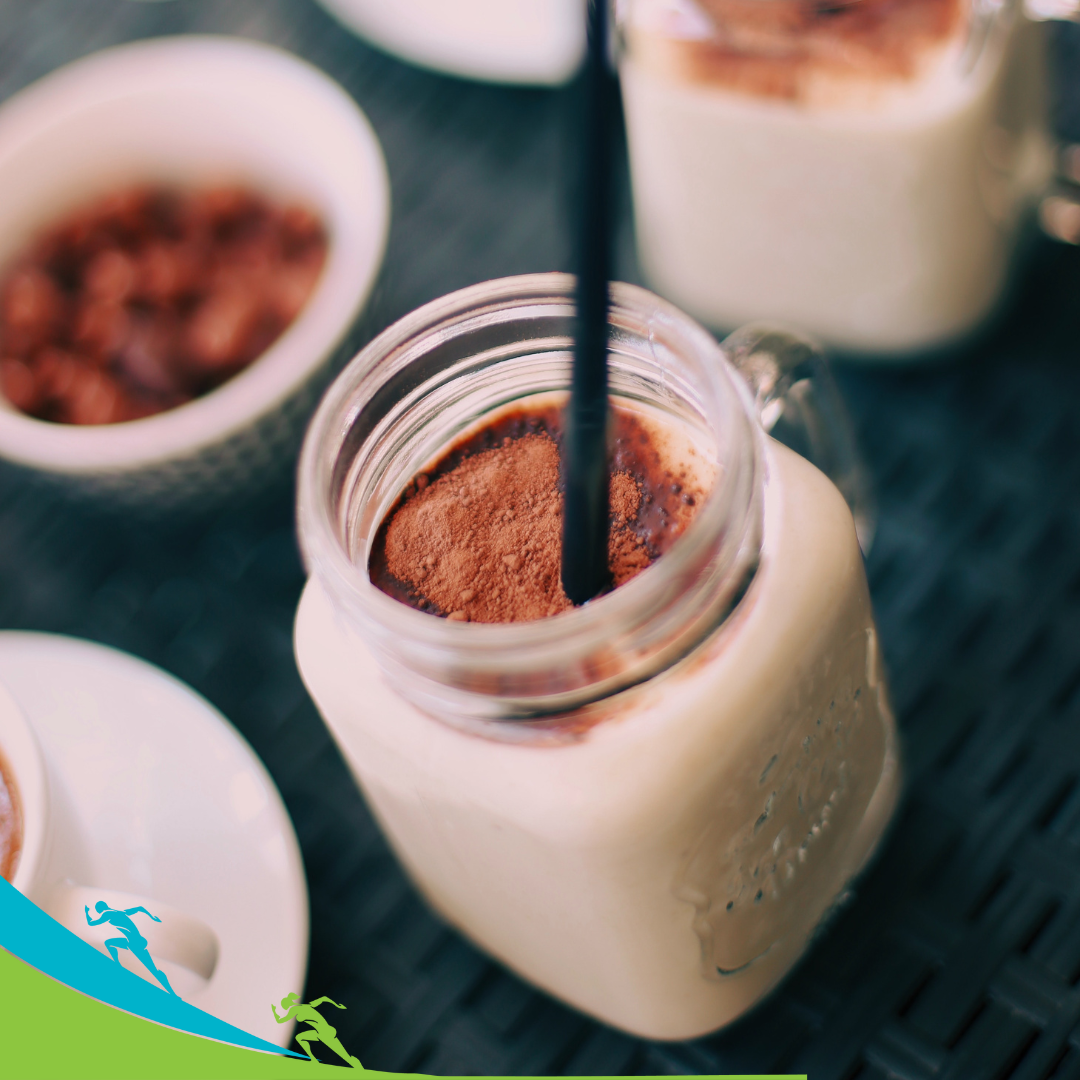
Crack all of the eggs into a large bowl and whisk until blended. Stir in the onions, veggies, and cheese. Evenly spoon the egg and veggie mixture into the muffin cups. Place in the oven and bake for 15-18 minutes. The muffins are done when a toothpick inserted into their centre comes out clean. This recipe includes is packed with nutrients and contains walnuts ( one of my favourite nuts). Walnuts rank high for containing omega-3 fatty acids, which are essential to your health. Walnuts provide the highest antioxidant content of ANY common nut. This matters because antioxidants fight inflammation and free radicals, offering protection against chronic diseases. Omega-3s are healthy fats that help protect against blood clots, the formation of plaque in your arteries, and they can boost good cholesterol levels. This means they’re great for your heart, and also boost brain performance. 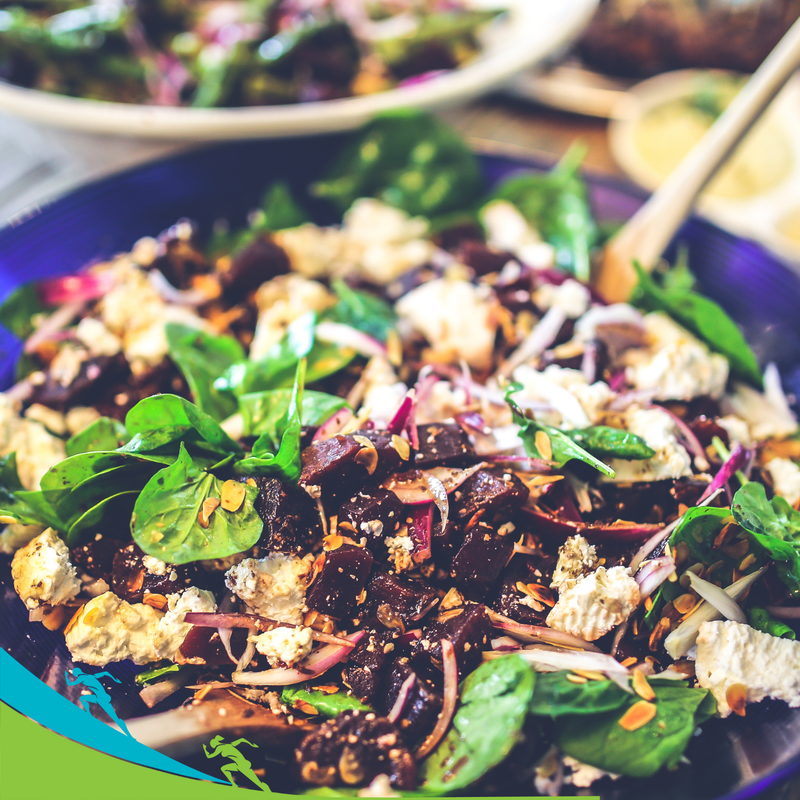 (2 main dishes, 4 side dish servings)
Whisk together the oil, vinegar, salt, and pepper in a large bowl. Mix the onion into the dressing. Add the rest of the ingredients and toss well to coat. Enjoy! Oh, YES… these crispy chickpeas will be your new FAVOURITE salad topper! This recipe has all my favourite ingredients and is a rich source of vitamins, minerals, and fibre. The main ingredient, "chickpeas," may offer various health benefits, such as aiding weight management, improving digestion, and reducing your risk of disease. And it's 100% vegan.  (serves 4)
Place 1 Tbsp of oil and lemon juice in a large bowl and add the spinach, tossing well until all the leaves are coated. Sprinkle in half of the sea salt. In a large skillet over medium heat, heat 1 Tbsp of olive oil. Add the chickpeas, cumin, and the rest of the salt, until the chickpeas are hot and starting to crisp. Add the chickpeas to the spinach and toss well. Top with the avocado and serve. If you’ve ever tried a vegan “tuna” salad wrap at a deli ... you know they are surprisingly delicious. It can make you wonder, how did they make those chickpeas taste like that?! This is tasty the day you make it, but the flavours develop a little more if it sits covered in the refrigerator for several hours or overnight.  Makes 4 wraps
Pour the chickpeas into a medium mixing bowl and mash them with a fork. Stir in the rest of the ingredients, mixing well to incorporate. Taste and add more salt & pepper if necessary. Spread out the 4 wraps and add about ¼ of the mixture to each, along with optional lettuce, tomatoes, and avocado. Roll up and then enjoy! Have you ever had kale chips fresh out of the oven? It is SO GOOD! If you don’t know this yet; it’s normal for kale leaves to cook a bit unevenly — the leaves aren’t always the same thickness, and some might be drier than others. Toward the end of the cooking time, keep an eye on your kale and remove any leaves that look like they might be charring.  (serves 4)
Preheat your oven to 275ºF/140ºC and line a rimmed baking sheet with parchment paper. Cut the kale into 2-inch (5 cm) pieces. Set aside. Pour the oil and lemon into a large bowl and add the kale, tossing with your hands to make sure the greens are well coated. Place the kale on the baking sheet in a single even layer. Sprinkle the kale with sea salt and nutritional yeast and place in the oven for 10 minutes. Stir and cook for another 8-10 minutes, until crispy. Remove from the oven and enjoy! If you have joined our Facebook group, you know that we feature a food each week that inspires me to write a recipe blog. This week's recipe blog is inspired by the food of the week "cardamon," posted on our Facebook group page. You will LOVE the exotic flavours that cardamon brings to this recipe. This week's recipe blog is inspired by the food of the week, "cardamon," posted on our Facebook group page. You will LOVE the exotic flavours that cardamon brings to this recipe. 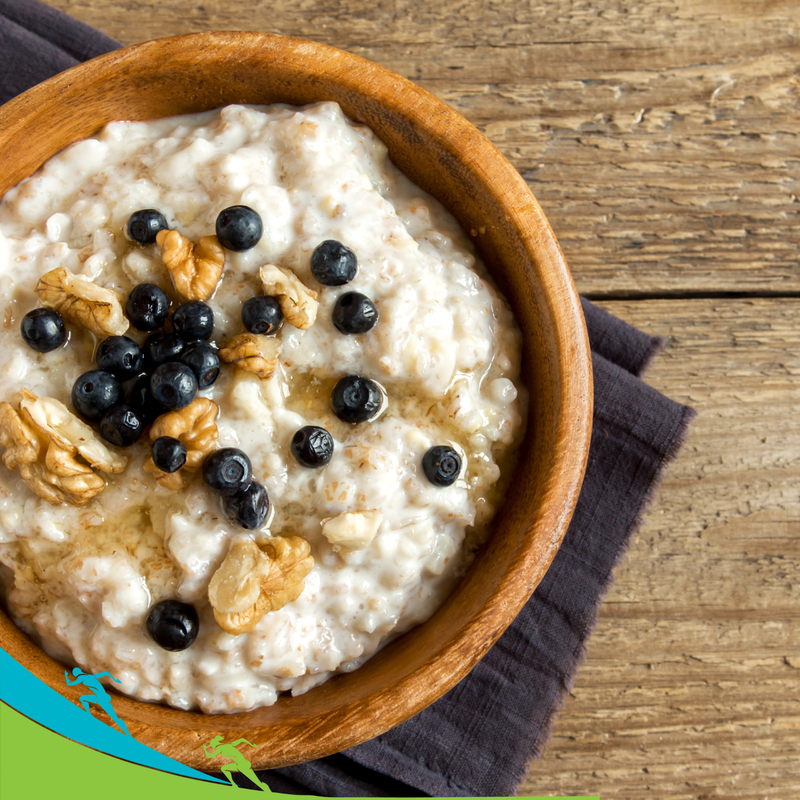 (makes 1 serving)
1 cup (240 ml) unsweetened vanilla oat milk ½ cup (40 grams) rolled oats ½ tsp cinnamon ½ tsp ground cardamom 2 tsp pure maple syrup Sprinkle of sea salt 2-3 drops of pure vanilla extract 2 Tbsp chopped walnuts for topping In a small pot over medium-high heat, heat the oat milk to a boil. Stir in oats, cinnamon, cardamom, maple syrup, and sea salt. Reduce the heat to low and let simmer for 3 minutes. Turn off the heat, stir in the vanilla, and cover, and let sit for 5 minutes. Put in a bowl and add more milk if necessary to thin it out. Top with walnuts and enjoy! I’ve got a tasty, filling, and nutritious recipe for you today featuring cabbage that is loaded with vitamins and minerals that help your metabolism, your energy level, and your digestive system. Cabbage is good for your gut health due to its prebiotic quality, which means it serves as food for the good bacteria in your intestines. This recipe contains all the satisfying flavours of stuffed cabbage without the time and effort.  (makes 8 servings)
Heat the olive oil in a large soup pot over medium-high heat. Add the beef/turkey and cook, stirring often until it’s cooked through, about 6 minutes. Add the cabbage, onion, carrots, and celery, and cook until the onion softens and begins to become translucent, about 5 minutes – stir often. Add the Italian seasoning, salt, pepper, and hot sauce. Stir in the tomatoes and broth and bring to a boil. Stir in the rice and reduce the heat to low. Cover and cook until the rice is done, about 35 minutes. Taste and adjust seasonings before serving. Enjoy! You are in for a TREAT today!:) It’s a fast and easy recipe that will help you get more protein in your diet while you snack on these delicious treats. This recipe is high in protein, and of course, protein helps your body maintain and build muscle. Plus, it can speed up workout recovery, and it helps you feel fuller longer. The most popular kind of powder on the market is WHEY protein...which comes from dairy and includes all nine essential amino acids. Check the label because, all too often, they’re filled with added sugar, fat, or calories.  (yields 18 balls/9 servings)
Mix the protein powder and almond meal in a medium bowl. Stir in the peanut butter and maple syrup – the dough should be thick! Gently fold in the chocolate chips until well combined. Using a tablespoon measure, scoop out the dough and form it into balls and place in a single layer in a storage container. Store in the fridge for up to a week. You’re welcome :) This is an all-purpose dressing you'll love that adds a creamy, spicy kick to veggies, salads, drizzled over black beans or quinoa, and even as a taco sauce! This recipe will keep in the fridge for 2-3 days in an airtight container. 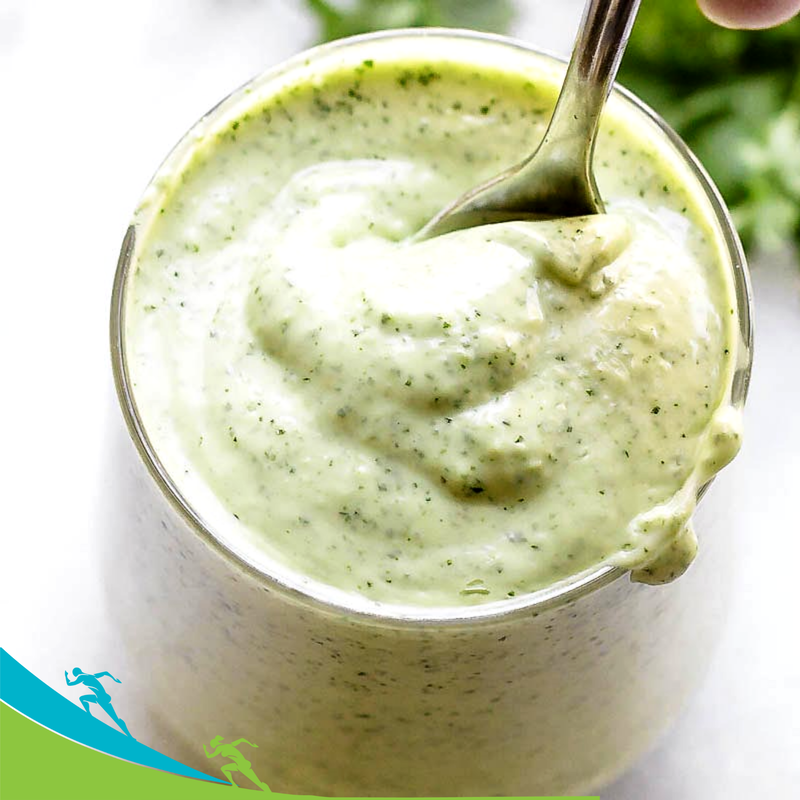 (makes 8 servings)
Place all of the ingredients in a blender and blend until smooth. Taste and just seasoning. Pour into a bowl or airtight storage container, scraping the side of the blender. Enjoy! This recipe is similar to soup stock ad believed to help boost immunity, improve gut health, and reduce the pain & inflammation of conditions like arthritis. One thing (besides the nutritional benefits and taste) that’s so great about this recipe … is that you’re using almost every part of the chicken. Roast the chicken one day to eat the meat, and use the rest of the chicken to make this bone broth. Buy a good quality organic chicken for this recipe! You can use this as a soup base, in recipes, or drink it as a comforting snack.. 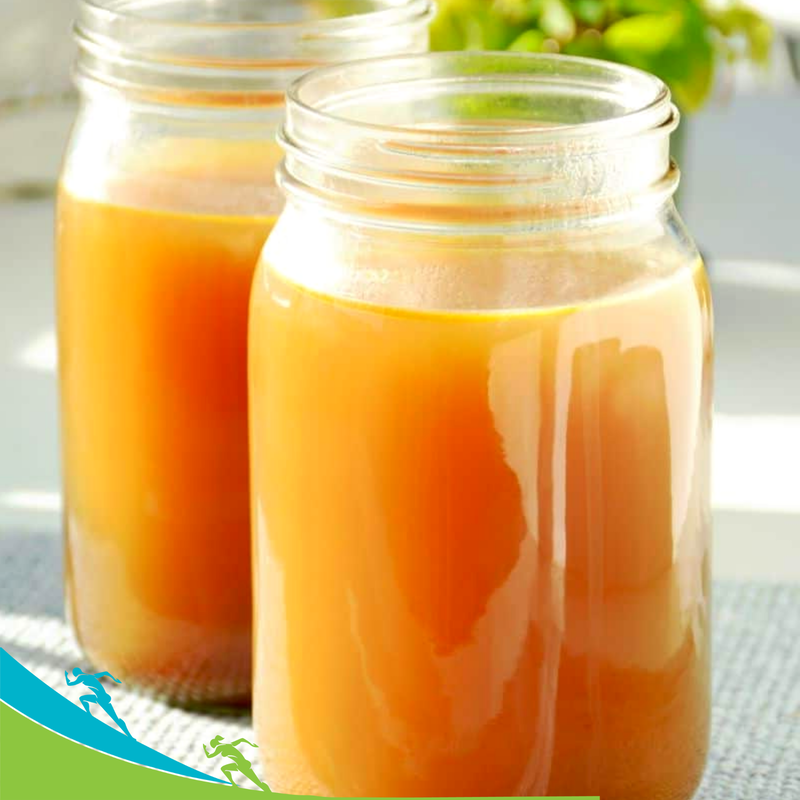 (Makes 6-8 servings)
Place the chicken bones (including legs, wings, and carcass) in a slow cooker. Pour the water over the chicken, which should be covered, and add the salt and pepper before pouring the vinegar over it. Place the cover on the slow cooker and turn it to high for one hour, then reduce it to low and cook for 10-12 hours, or until the liquid reduces by about half. Strain, reserving the liquid, and discard the bones. Use immediately or let cool slightly before placing in glass jars. It will keep in the fridge for about 3 days. If you notice gelatin forming on your broth in the refrigerator, that’s because of the collagen in the broth. It will become liquid when reheated. Soooo good for you. This no-sugar-added recipe is simple and delicious as a healthy dessert, and it’s also elegant enough for company. Pears are not only deliciously sweet, but they also offer lots of health benefits. Pears are full of fibre that helps keep your digestive system happy. They contain prebiotics that feeds the good bacteria in your gut, keeping it healthy and in balance. Their high copper content works with iron to ensure your body can produce red blood cells, which also keeps your blood pressure and cholesterol low. Pears also contain “flavonoids,” which are antioxidants with anti-inflammatory properties that protect against diseases like cancer and diabetes. 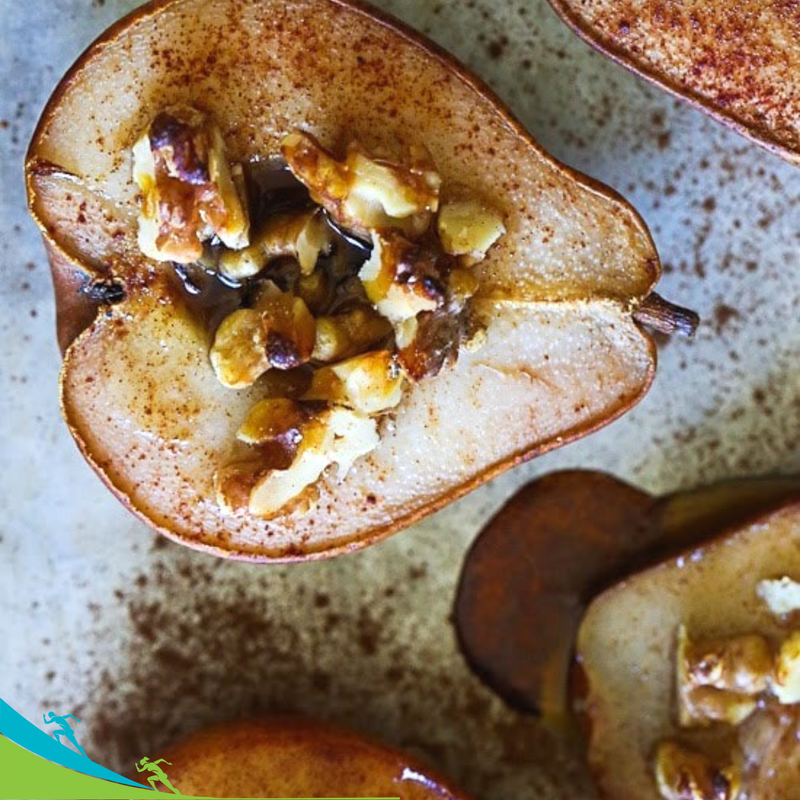 (serves 4)
Preheat your oven to 350ºF/177ºC. Using 1 Tbsp of the butter, butter a 9” x13” (23cm x 33cm) baking dish. Peel the pears cut them in half, and remove the core. In a small bowl, whisk the butter, vanilla, and cinnamon. Brush the pears with the mixture on both sides. Arrange the pears in the prepared baking dish, cut the side down and sprinkle with the walnut pieces, and bake the pears until fork-tender, about 40 minutes. These are great warm or cold – try topping them with coconut whipped cream! Yum!!😋 Do NOT be intimidated by this recipe – it’s just beans & quinoa with a bunch of delicious spices and flavors! That means it’s also super versatile. Feel free to experiment with different flavors based on what you have on hand. You could serve these over chickpea pasta … as a main dish (smothered with the cashew queso I posted last week, perhaps?) with a side salad … or on top of a salad. 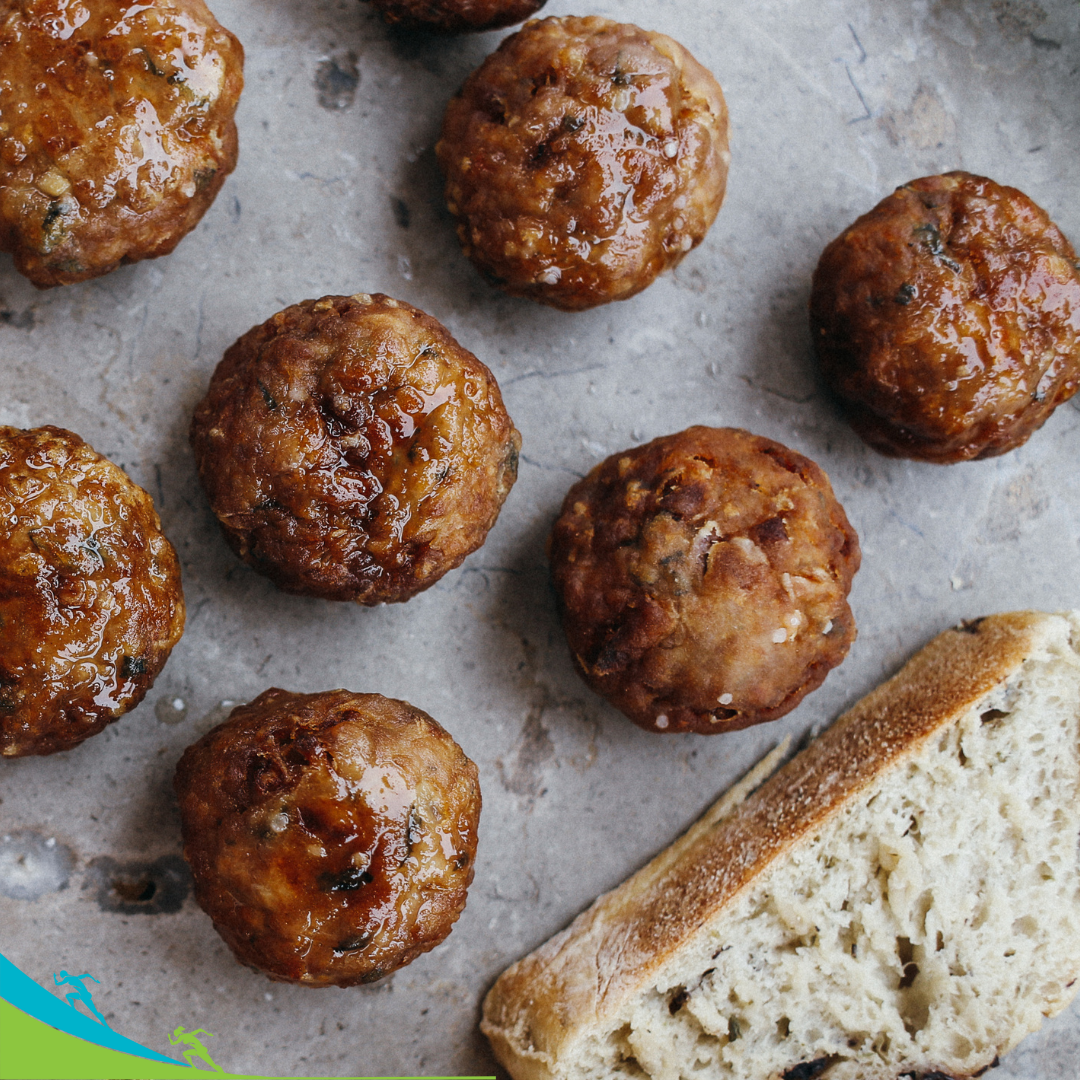 (Makes about 10 “meat” balls)
Dry off the black beans using a clean kitchen towel or paper towels. Place the beans on a parchment-lined baking sheet and bake for 10-15 minutes, or until the beans feel dry to the touch. Remove the beans from the oven and raise the oven heat to 375ºF/190ºC. While the beans are baking, heat 1 Tbsp olive oil in a large oven-safe skillet over medium heat. Add the onions and saute for a couple of minutes before adding the garlic. Continue to saute until the onions are softened, and then remove the skillet from the heat. In your food processor, pulse together the beans, sauteed onions & garlic, salt, Italian seasoning, and optional red pepper flakes. When it reaches a loose mealy texture, add the quinoa, nutritional yeast, tomato paste, and coconut aminos. Pulse until it barely forms a wet “meaty” dough (not a puree). Taste and adjust seasonings. If you prefer a cheesier taste, add more nutritional yeast. Scoop out 2 Tbsp at a time, forming into balls. Place on a parchment-lined plate and refrigerate for 20-30 minutes. Heat the oven-safe skillet over medium heat. Add 1 Tbsp of oil and when it’s hot, add the “meat” balls. Sauté, turning occasionally, until each ball forms a crust around the outside. Place the skillet in the oven and bake for 25-30 minutes until the meatballs turn golden brown. They are ready to serve as-is, or you can simmer them in your favorite marinara sauce for another 5-10 minutes. Serve these with your favorite pasta or zoodles, as a hearty sandwich filling, or as a side dish with veggies. This is a fast & easy plant-based soup that carries a hefty dose of plant-based protein. … and it’s made with frozen peas! This is easiest to make with an immersion blender but you also can use a regular blender – just be careful! Serve it with sprouted grain bread and a side salad for a delicious lunch or dinner... 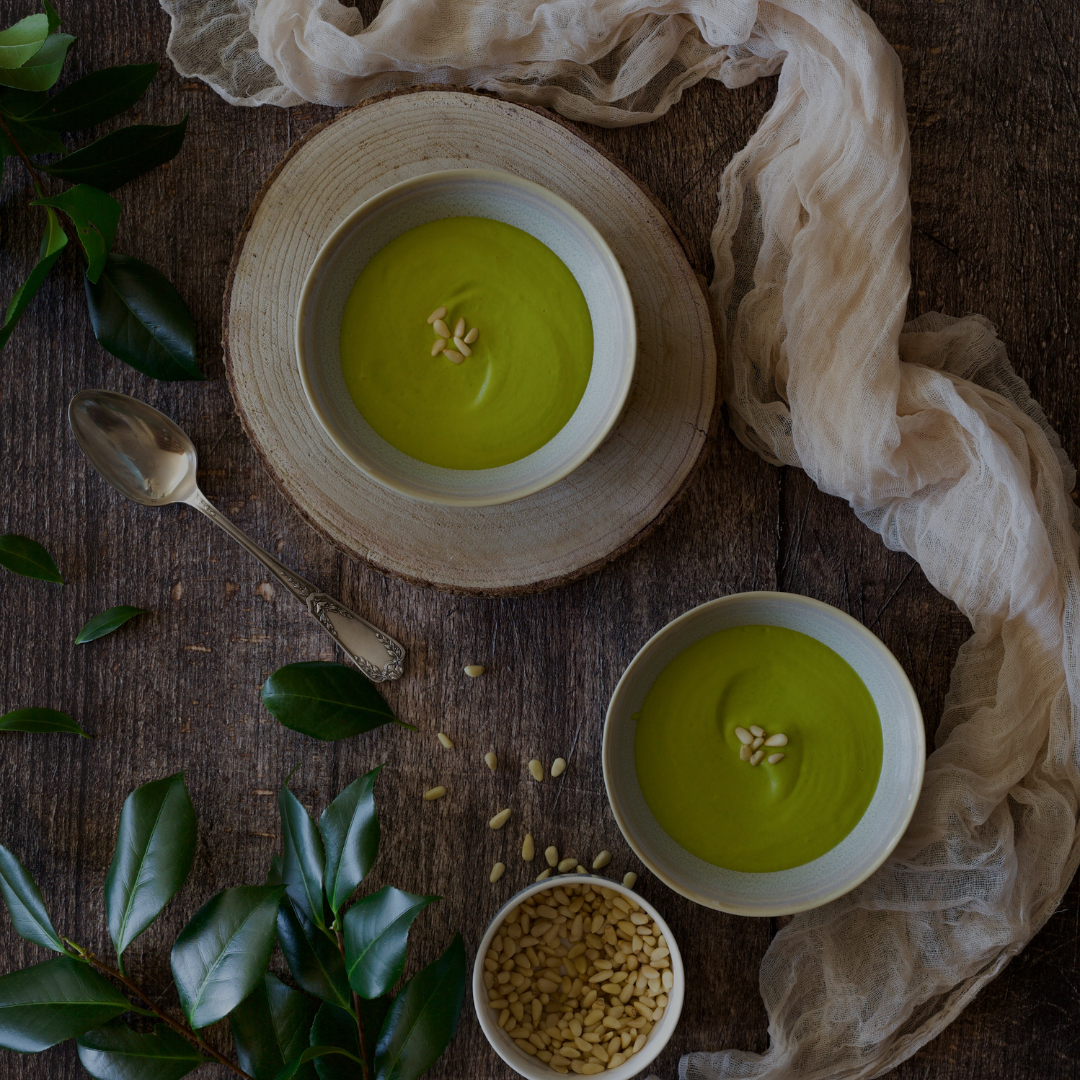 (Serves 4)
Heat the olive oil in a large pot over medium-high heat. Add the onion and garlic and cook, stirring frequently, until the onion is transparent, about 2-3 minutes. Add the peas, spinach, stock, thyme, and bring to a simmer. Cook until the peas are heated through and the spinach is wilted. Stir in the nutritional yeast. Carefully blend the soup with an immersion blender. If you don’t have one, you can blend it in two batches in a regular blender, being careful not to splatter any hot liquid. Taste and add sea salt if necessary. Enjoy! You’ll love the sweet-spicy flavours of this chilli recipe. Just brown the turkey and put the rest of the ingredients into a slow cooker. When it’s done several hours later, voila! A full meal in one dish. It makes an excellent meal prep recipe because it can keep several days in the refrigerator and can also be frozen. Check your grocery store’s produce section for already cubed squash. Cutting up the squash is the most challenging part of this set-it-and-forget-it recipe! 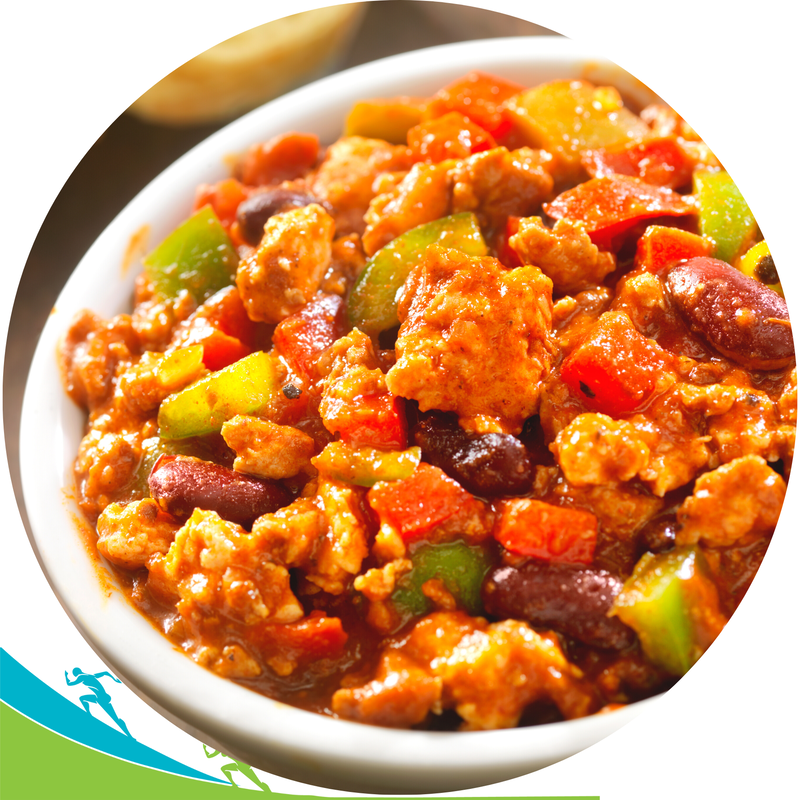 (makes 6 servings)
Heat the olive oil in a nonstick skillet over medium-high heat. Add the turkey and brown, frequently stirring, for about 5-6 minutes. Place in a large slow cooker. Add the tomatoes, black beans, onion, squash, water, tomato paste, chilli powder, cumin, coriander, sea salt, hot sauce, and garlic. Stir well to combine. Cover and cook on high for 4 hours or low for 6-8 hours. That’s IT. Enjoy :-) Do you love “hacks” when it comes to fitness and health? I know I do! Well, these fruits and veggies below can help power up your workouts and recovery in a big way … And I bet the next time you see them in the grocery store, you’ll look at them in a whole new light! 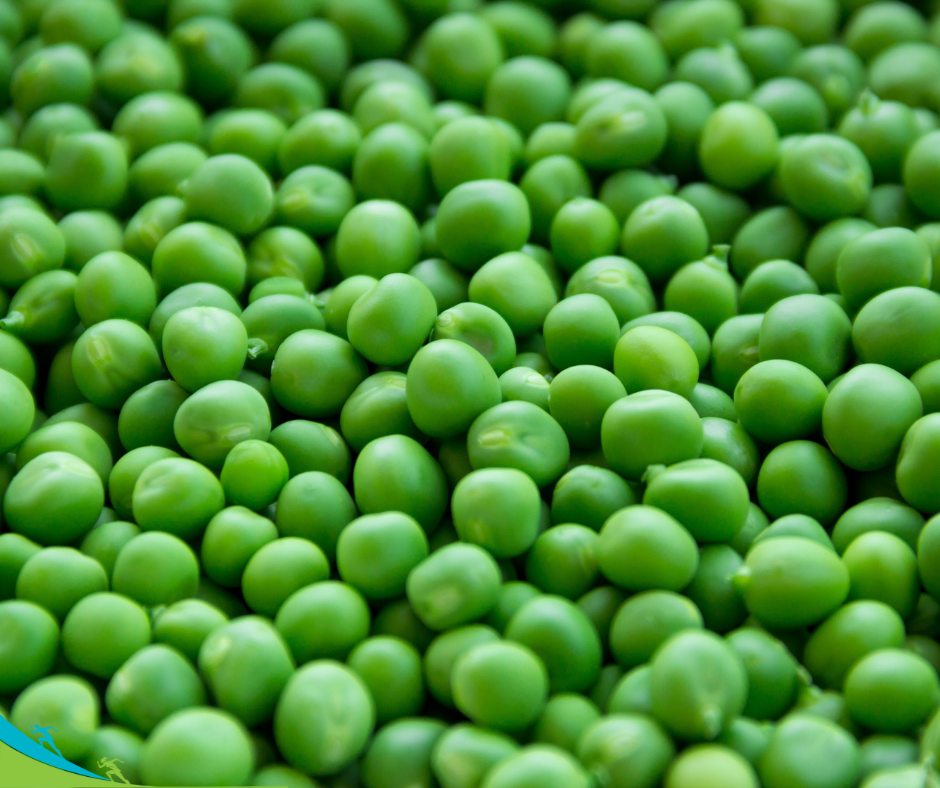 Green Peas. Peas are rich in protein (vital in the repair & rebuilding process), plus they contain magnesium and vitamin B6, both of which help with energy production, muscle contraction, and nerve function.
Oranges. When you work out, you create free radicals (aka “oxidative stress”) in your body, which can damage your cells. The vitamin C in oranges helps sweep up those free radicals while also boosting your immune system. Another vitamin C superpower: helping you absorb iron from plant-based foods, is especially important for female athletes. Beets. Packed with nitrates, beets can boost your circulation, increasing the delivery of oxygen and nutrients to your muscles. This is important during and after your workouts. Tart cherries. These small fruits are loaded with antioxidants that help you recover from workouts by reducing inflammation and muscle soreness. A small amount of tart cherry juice mixed into a protein shake is a great post-workout choice. Spinach. Dark leafy greens contain important nutrients that boost performance, including magnesium, vitamin C, zinc, iron, and calcium. Not only that but they are one of the best sources of vitamin K, which helps you build and maintain healthy bones (as well as promote heart health). Bananas. This fruit is a portable and easy-to-digest carb source to give you fast pre-workout fuel. Even better, they’re packed with potassium, an electrolyte you need to maintain normal fluid levels in your cells. Potassium also helps your muscles contract and supports normal blood pressure. Sweet potatoes. There’s a reason sweet potatoes are a top choice by athletes. They are loaded with vitamin C, vitamin b6, potassium, and fibre. They also contain manganese, which can help your cells produce energy. Pretty great list, right? Food is fuel! Next time you plan or prep your meals, think about adding a few of them to your daily intake. This recipe is incredibly nutrient-dense – high in protein and micronutrients your body needs ... while low in calories. One serving contains almost 50% of the recommended daily intake (RDI) of selenium, which is excellent for your heart. The main ingredients (Shrimp) is an excellent source of iodine, which is necessary for proper thyroid functioning and brain health. They also are LOADED with an antioxidant called astaxanthin. This carotenoid helps protect your cells, strengthens the heart’s arteries, and guards your brain. There are so many ways to eat shrimp. In salads, stir-fries, tacos, and even as a snack! I thought I would share a slightly exotic recipe ... a shrimp curry with roasted oranges. Serve it with a side salad and some rice or quinoa for a complete meal. It’s important to remove the white “pith” from the oranges because it can have a bitter flavour.  (makes 4 servings)
Preheat your oven to 400ºF/200ºC. Line a rimmed baking sheet (with sides) with parchment paper. Using a sharp knife, slice the oranges and then cut the slices into quarters. Spread the oranges on your baking sheet and sprinkle with sea salt. Roast for about 10 minutes – they should be slightly dry. While the oranges are in the oven, toss the shrimp with the oil, curry powder, oregano, hot sauce, and pepper in a medium bowl. Remove the oranges from the oven and add the shrimp to the pan. Return to the oven and bake for another 5-6 minutes until the shrimp are cooked through – they should be pink and slightly curled. Remove from the oven and serve over the rice or quinoa. SO DELICIOUS! |
Categories
All
Author BioNatatia Gemmell. |
 RSS Feed
Functional Performance Fitness
|
Settlers Ridge Centre 275 Brockville St, Unit 14 Smiths Falls, ON K7A 4Z6 Phone: (613) 205-1234 Email: info@functionalperformancefitness.ca Staffed Gym Hours Monday - Friday: 8 am - 8 pm Saturday: 8 am - 12 pm 24 Hour Gym 24 hour with key fob access Privacy Policy Terms of Use |